These steps will guide you through the process of creating video recordings using zoom.
Step 1. Install Zoom meetings software
Zoom is available to Duke students, faculty, and staff free of charge.
You can download it here:
Step 2. Under Zoom preferences, adjust the following settings
Audio Settings
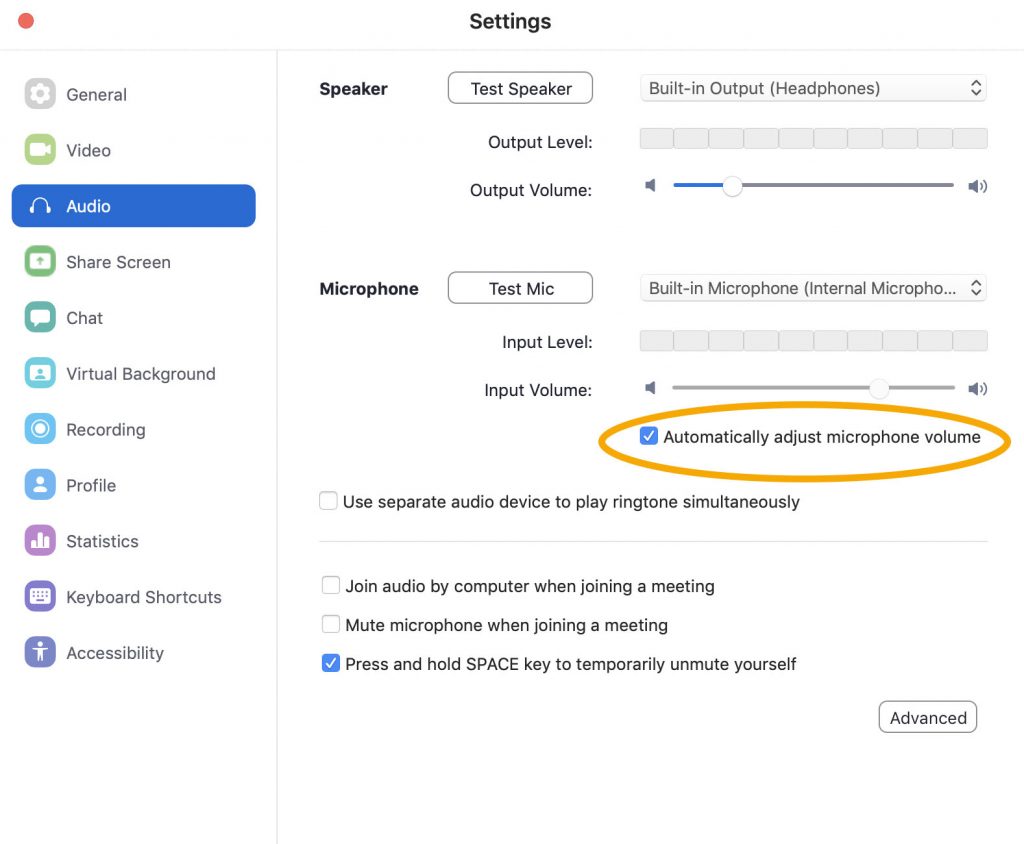
- Under audio settings, select “automatically adjust microphone volume

Be sure to select the option to “automatically adjust microphone volume” to ensure the best results.
Video Settings
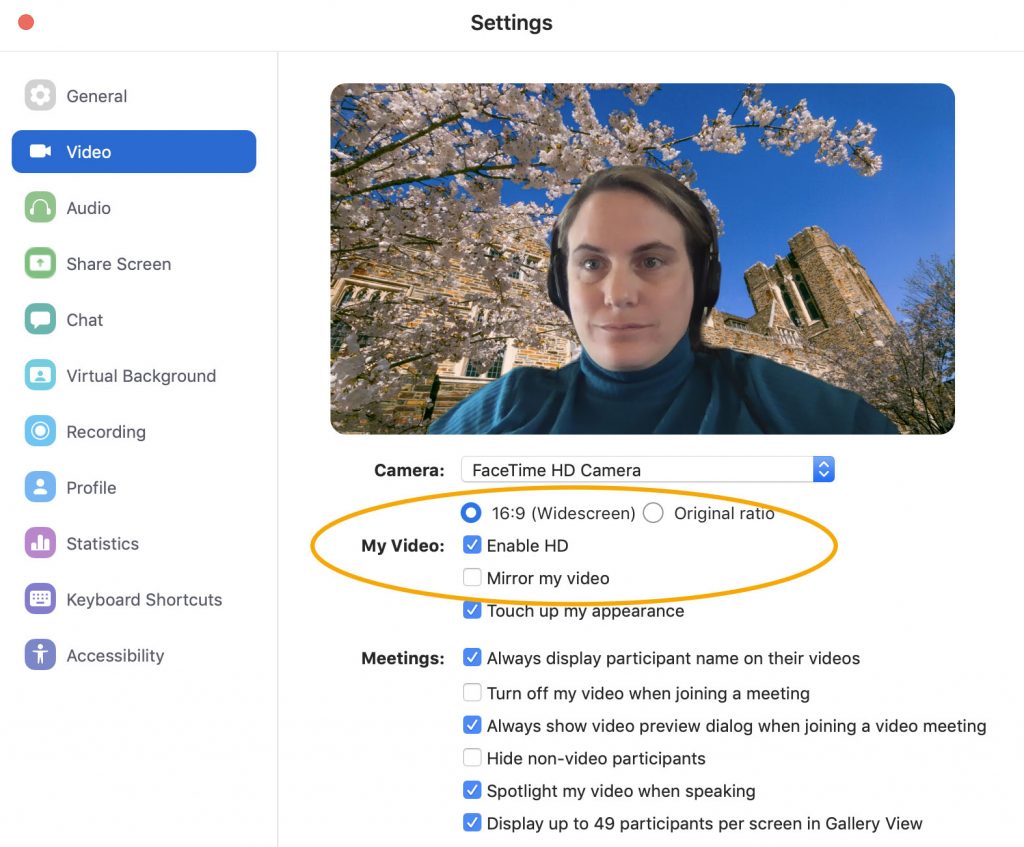
- Under video settings, select “16:9 (widescreen)”
- Under video settings, select “enable HD”

Select the 16:9 (Widescreen) option and the “Enable HD option for best results.
Recording Settings
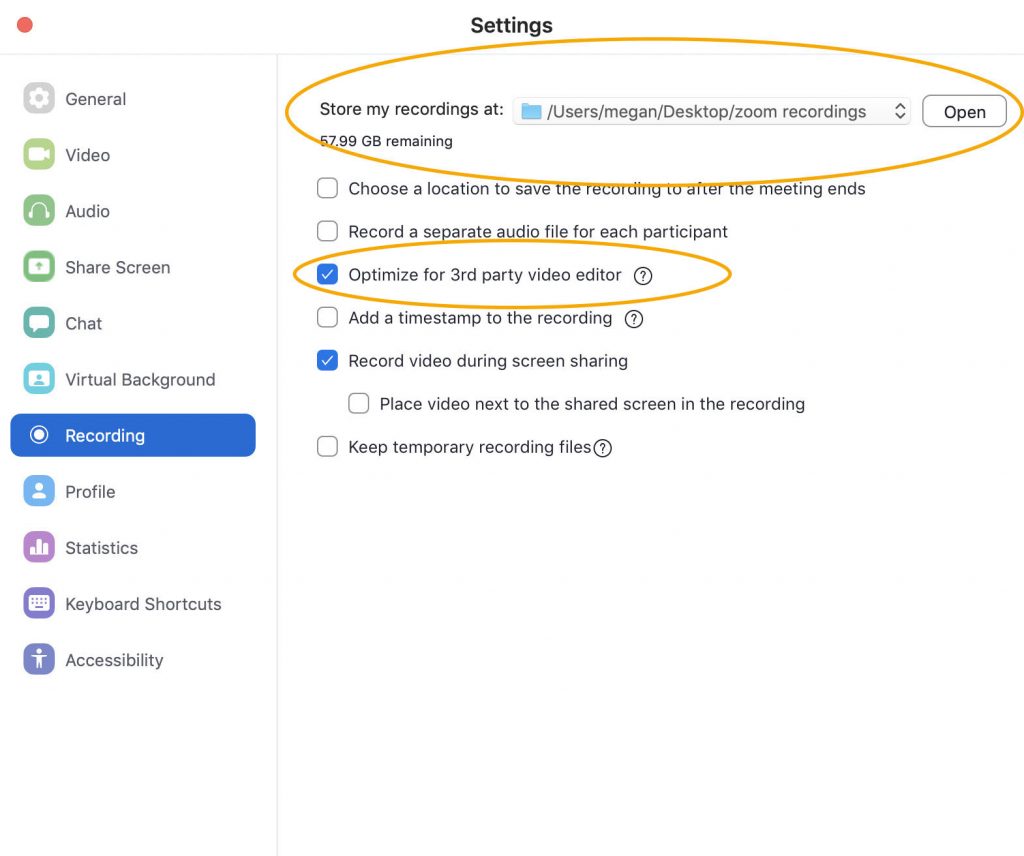
- Under “local recordings” at the very top, pick a spot on your computer to store your video recordings. (for instance, you can create a folder on your desktop called “Zoom recordings” and send all your clips there.)
- Under recordings, select “optimize for 3rd party editor” which will make the video clips ready for editing.

Under “local recordings” at the very top, pick a spot on your computer to store your video recordings. Then select “optimize for 3rd party editor” which will make the video clips ready for editing.
Step 3. Launch Zoom and select “new meeting,” which is the orange icon on the top row
- If prompted, allow Zoom to access your computer’s video camera and microphone
- When the next screen pops up, you should be able to see a video of yourself

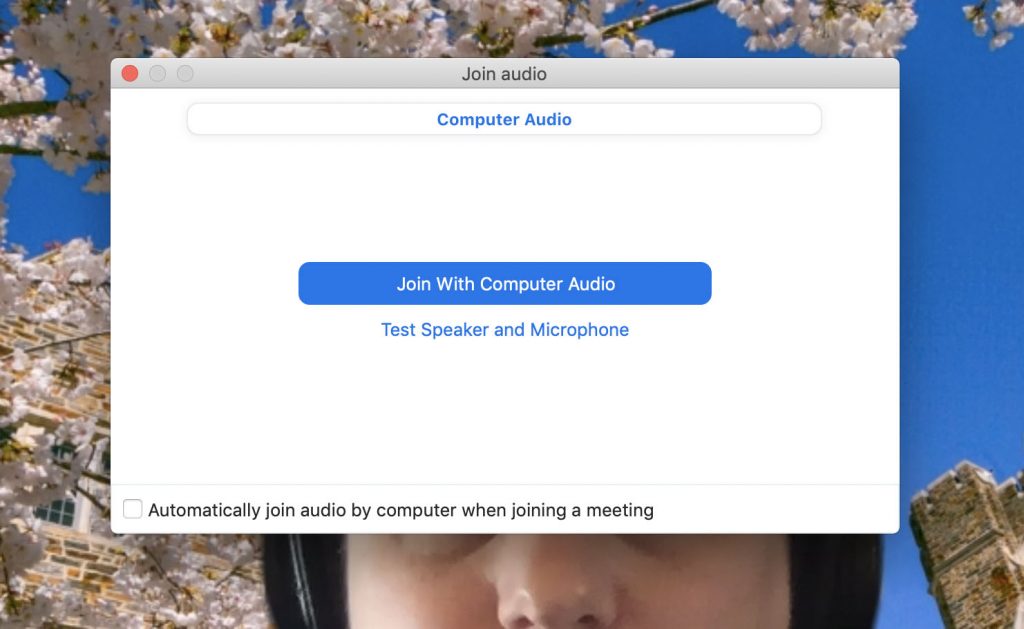
When prompted, select the “Join With Computer Audio” tab.
Step 4. Select “unmute”
Be sure that you are “unmute” (on the lower-left corner of the recording screen) so the computer will record your voice

The mute button is located on the lower-left corner of the screen. Make sure you are not muted when you begin your recording.
Step 5. Begin recording
- In the menu bar on the bottom of the screen, select “record” and choose whether you’d like to save your recording to the computer or cloud
- Direct your gaze toward the top of the computer screen where the camera is located
- Speak clearly at your normal volume.

The record button is located on the bottom of the screen, toward the middle on the screen.
Step 6. Conclude recording
- Press “stop recording” on the top left of the screen
- Then select “end meeting” on the bottom right of the screen
- At that point, your video will convert to a .mp4 video file
- You can share the file through Duke Box
*If you use a smartphone or tablet for video recordings, make sure to record video in one of the following settings:
- 1080 HD at 24 or 30 frames per second (this option will take up less recording space on your device)
- 4K at 24 or 30 fps

Leave a Reply
You must be logged in to post a comment.