One of my favorite parts of taking scenic campus photos is showing how members of the Duke community enjoy our amazing campus. Unfortunately, the heat and humidity of North Carolina summers cause most folks to stay indoors. So, during the summer, I shift my focus toward showing Duke’s beautiful architecture and landscape. Here are a few tips and tricks I’ve learned throughout my 16 years of documenting Duke during the summer months.
Head out during the mornings or evenings and avoid going out during the middle of the day. Not only is the light more flattering, but the heat is less intense, and there is a greater chance that you’ll run into people who are also out and about on campus.
The morning sun peeks through the trees overlooking Baldwin Auditorium on Duke’s East Campus.
Folks walk through the arches of the Chapel arcade during a summer evening.
The sun sets over the Duke Reclamation Pond.
Take advantage of the quiet time to focus on details. Our campus is one of the most beautiful universities in the world. However, during the hustle and bustle of the fall and spring semesters, it’s easy to overlook the amazing details of Duke’s architecture, flora, and fauna.
Water from the Roney Fountain at Duke Gardens sprays mist into the air on a hot summer day.
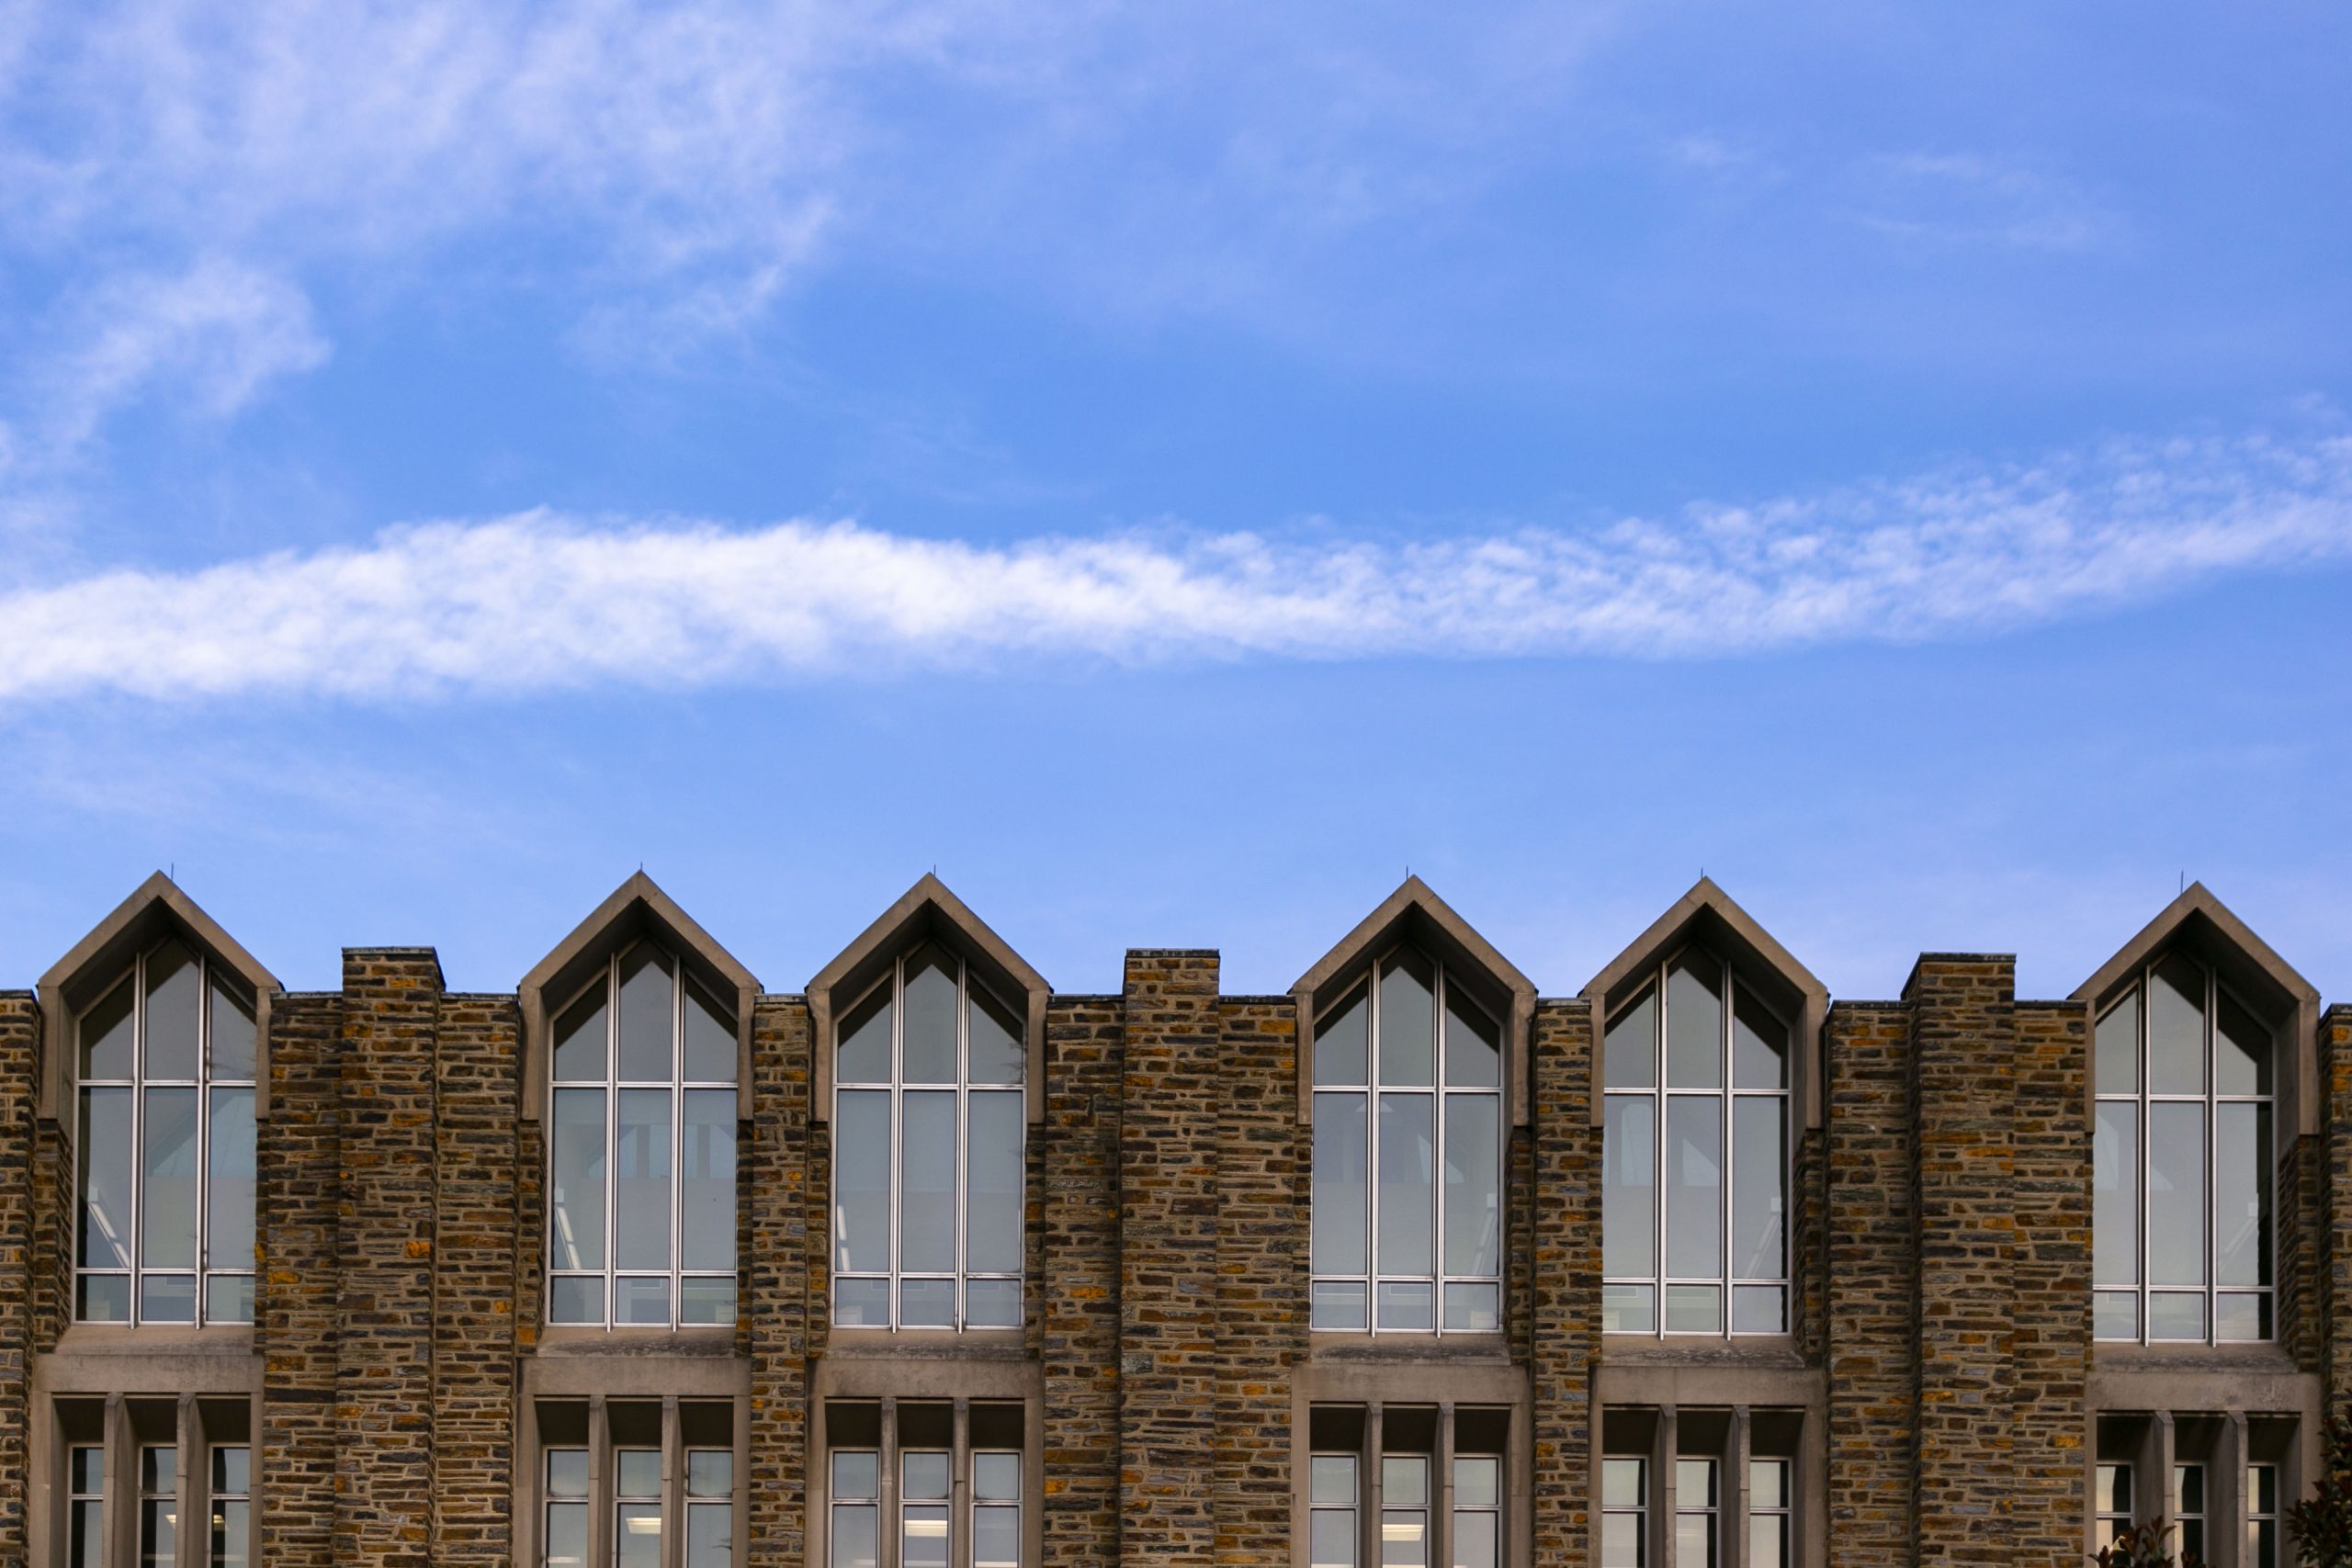
The windows of Perkins Library are framed against an evening sky.
A dragonfly rests on top of a lily pad in the fish pool at Duke Gardens.
It’s ok to head inside. Most of the time, I stay outside during my campus walkabouts, but there are times when heading inside to take a break from the heat can yield a nice photo.
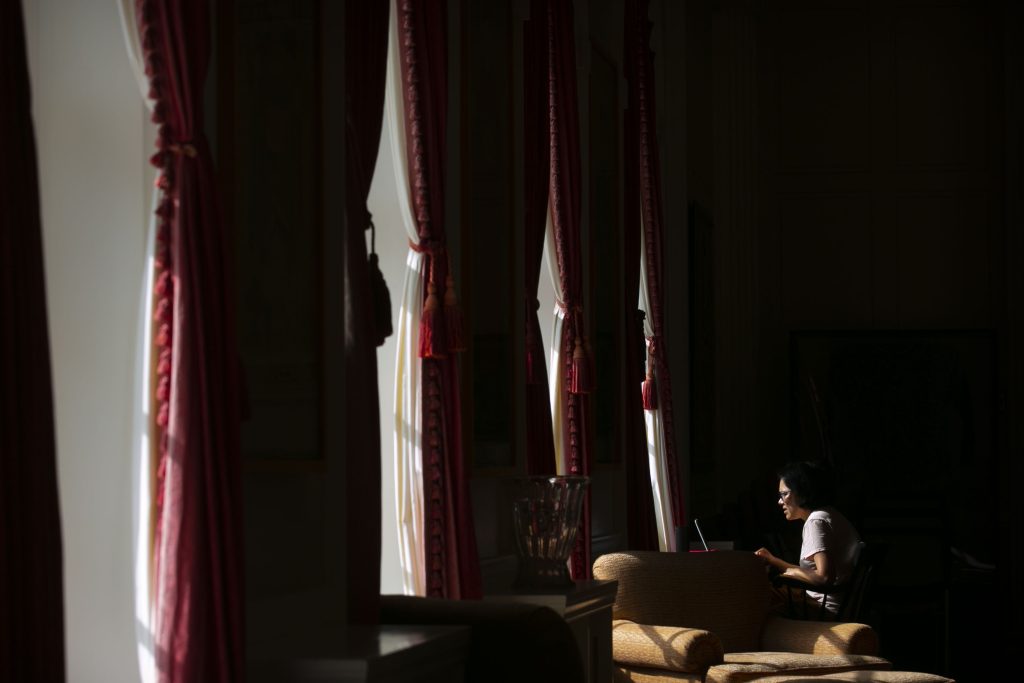
Lilly Library’s Thomas Reading Room, located on the second floor, offers a space for students to study on East Campus.
Experiment with video! One of my favorite summertime activities is watching the clouds. However, capturing their slow movement in a photo can be challenging, so I experimented with recording a time-lapse video of one of my favorite campus views.
Finally, stay hydrated and take plenty of breaks during your campus walkabouts. The fall will be here before we know it, and I’m enjoying photographing a quiet campus during the remaining weeks of summer.
UPDATE: On February 26, 2022, the Digital and Brand Strategy team was awarded a regional Emmy for “Merry & Bright”. Read more
After brainstorming a few ideas, we decided to use blue string lights and luminarias to light the residential quad on the west campus. The lights and luminarias represent our thankfulness for getting through 2020 and our hope for a brighter future.
Wrapping a 25-foot-tall tree in lights
Stringing holiday lights around a 25-foot-tall tree is no easy task, and not having access to a lift made the job more challenging. We used ladders, and a modified pole saw to string the lights half-way up the tree, but we couldn’t reach the top half of the tree, even with a 16-foot ladder. We experimented with many ideas, including using a slingshot and a frisbee to launch the lights into the tree’s upper part, but none of those worked.
Bill Snead, our photographer and digital assets manager, came up with the idea of using a pully system to string the lights into the upper part of the tree. First, he taped twine to a baseball, and then he threw the ball over the tree. Next, he tied a strand of lights to one end of the twine and then pulled the other end of the twine, dragging the strand of lights into the top of the tree. The only challenge with the pulley idea was throwing the baseball high enough to clear a 25-foot-tall tree. Thankfully, Ashley Wolf, our Social media Coordinator and former division one softball player, is on our team. She cleared the tree on her second try.
Adding an extra touch of “Duke”
Even with the blue string lights and the gothic architecture of the west campus, our message was missing a signature DUKE element. Fortunately, our director, Blyth Morrell, remembered that Alumni Affairs has a set of four-foot-tall cardboard letters that spell out “DUKE.” After a few (several) emails, she tracked them down, and we transported the cardboard letters from the Karsh Center to West Campus. They added the perfect touch of “Duke” to the festive scene.
A thousand luminarias of light
Teamwork makes the dream work, which was the case for creating, placing, and lighting 1,000 luminarias. Making the luminarias were straightforward. One group folded the bags; another group added sand and candles to the bags, while a third group began placing the completed bags on the quad. Timing the lighting of the luminarias was tricky. We wanted to capture the twilight, so all of them had to be lit by 4:45 pm. But, lighting them too early would cause them to burn out before we got our nighttime shots. To make the timing work, we had six people with grill lighters simultaneously lighting luminarias. We finished lighting them just as dusk arrived.
Merry & Bright
This year’s holiday message was one of the most ambitious projects of 2020. It was a multi-day effort involving over a dozen people, hours of planning, creative problem-solving, and teamwork. However, the result speaks for itself; the glowing luminarias and blue lights transformed the quad into a magical wonderland.
The University Communications team decorated a tree near the Brodhead Center with blue string lights and lined the residential quads’ walkways with luminarias for a holiday video.
Luminarias line the walkway leading to a tree wrapped in blue string lights. The holiday decorations were temporarily on display to film a holiday video message of peace and joy.
The University Communications team staged Duke’s west campus’s residential quads with luminaries for a hopeful holiday video message of peace and joy.
The University Communications team wrapped cardboard letters in blue string lights and placed them at the bottom of a decorated tree for a holiday video.
The University Communications team decorated a tree outside of the Brodhead Center with blue string lights for a holiday video.
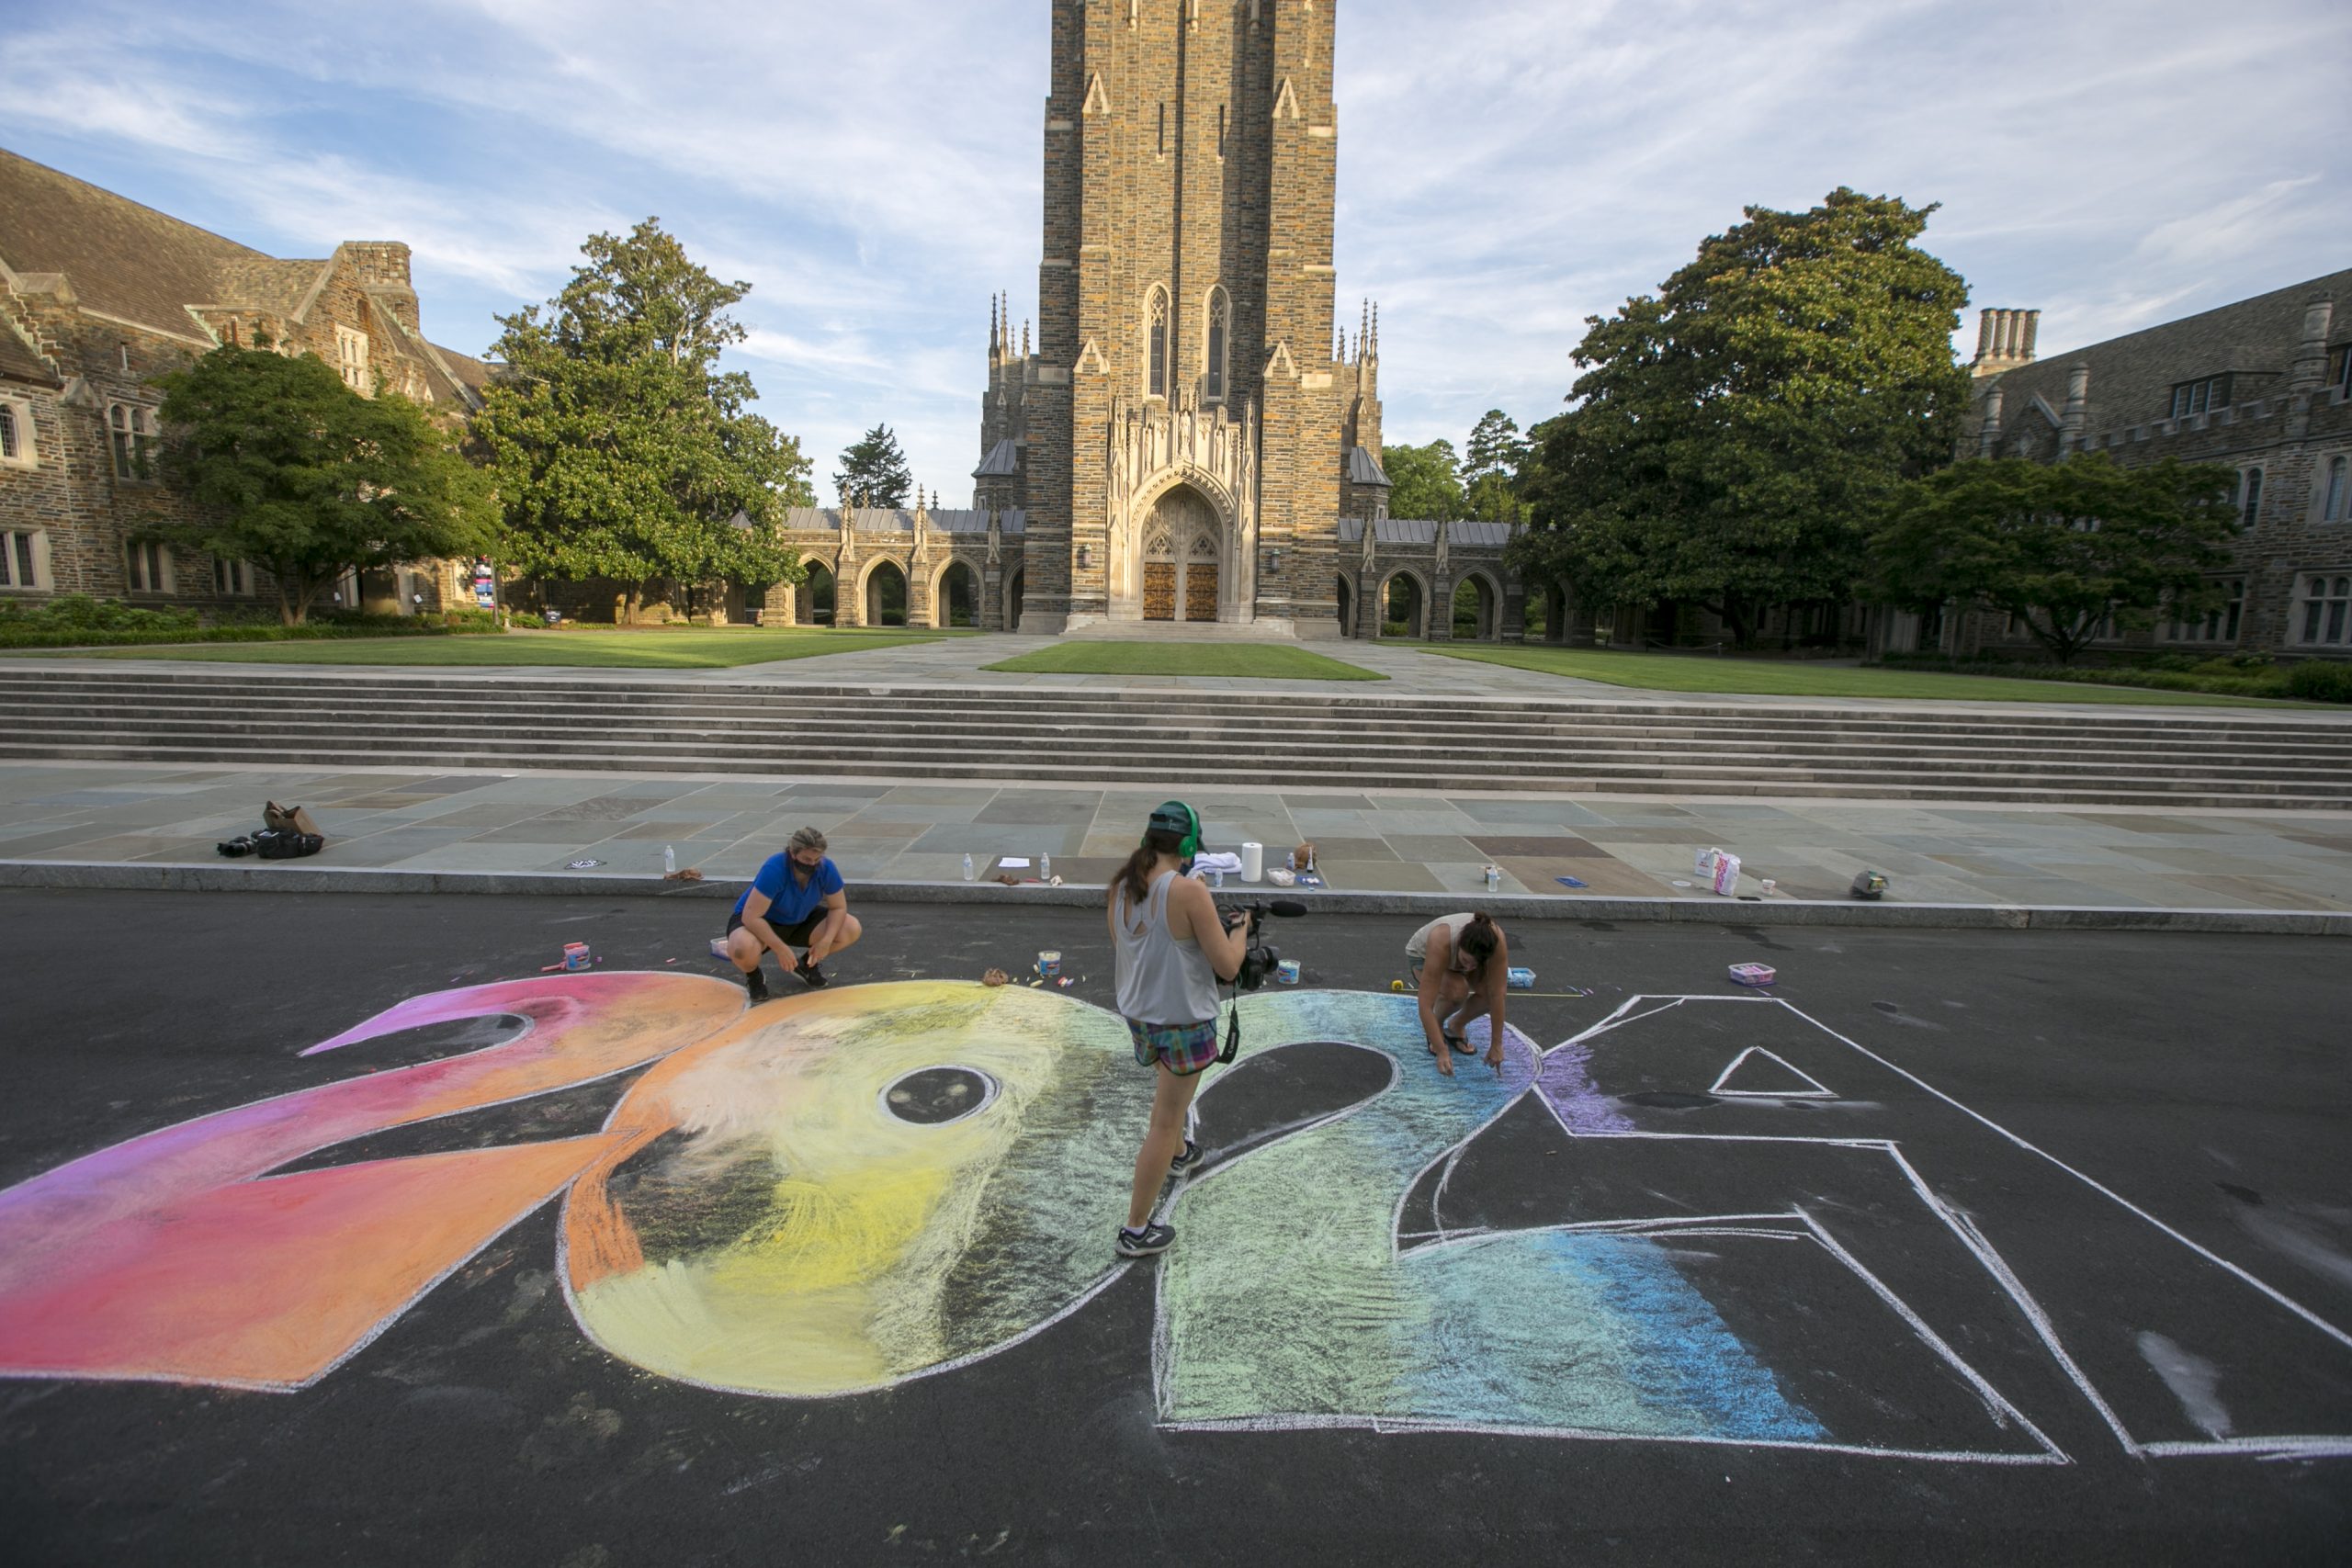
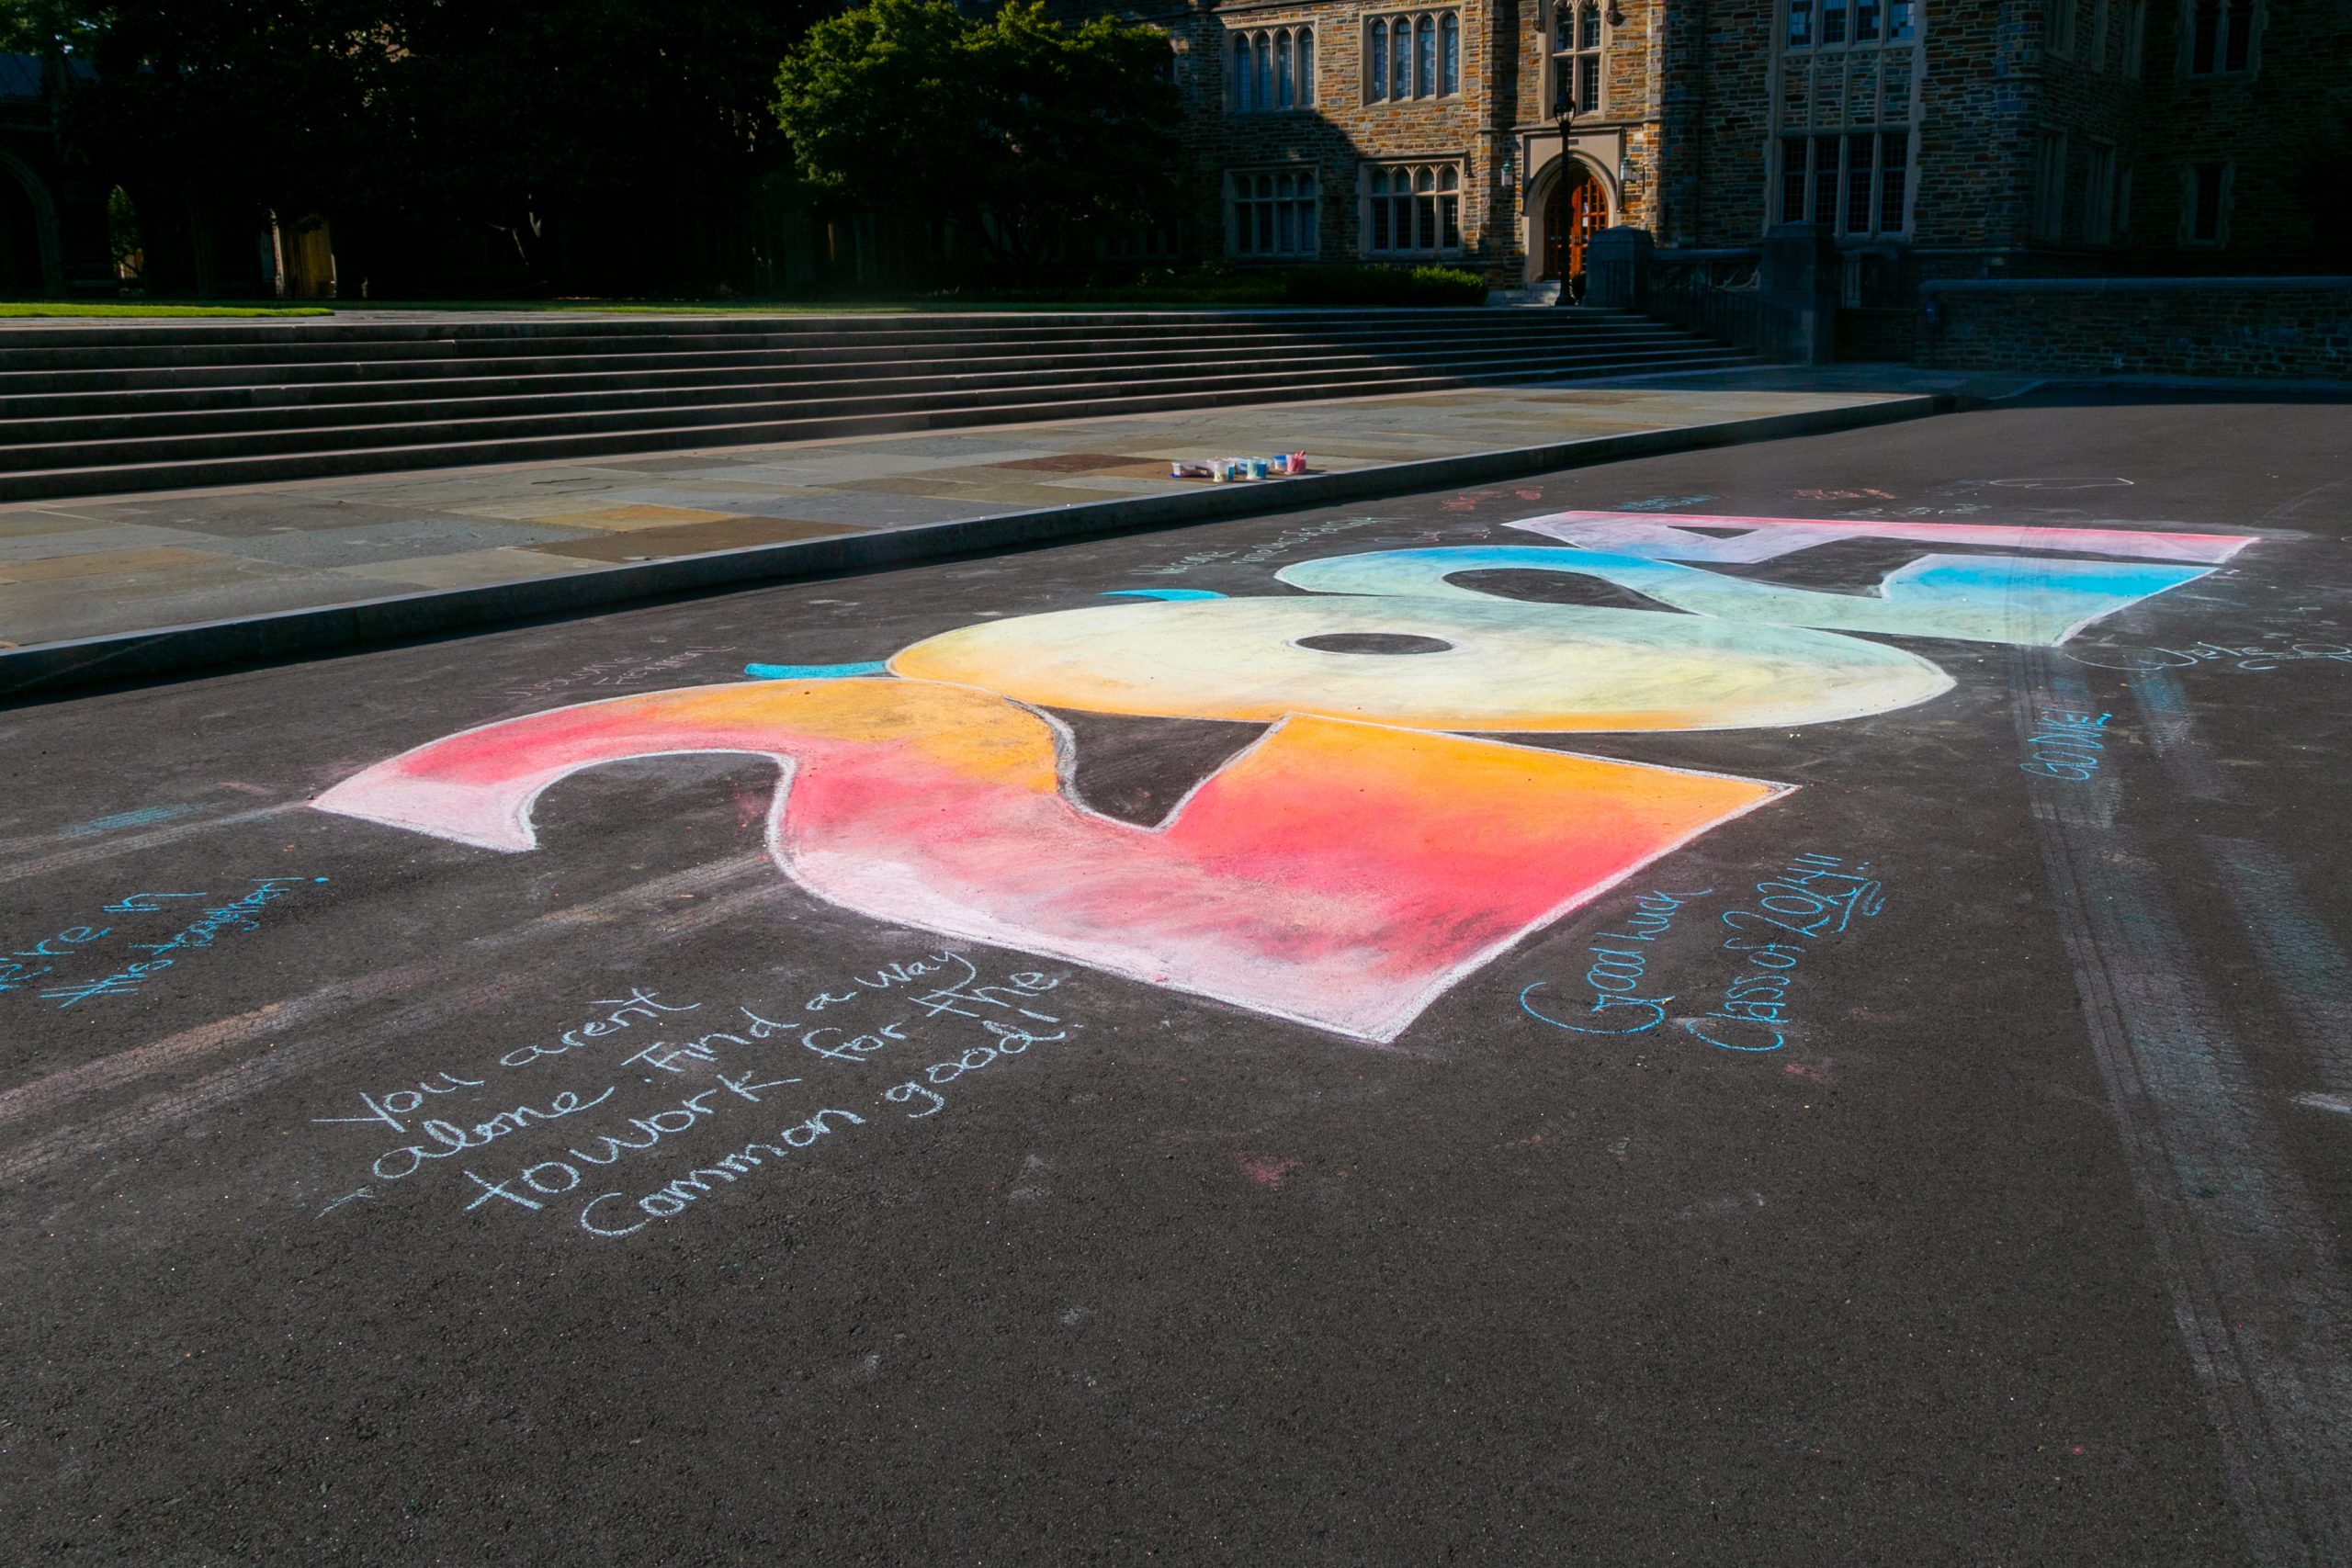
Members of the Duke DISCO team create a chalk mural to welcome the class of 2024 to campus for the Fall in front of Duke Chapel.
We caused the sidewalk chalk shortage in Durham, NC. But we did it for a good reason; to welcome the newest members of the Duke family, the class of 2024!
This year’s new student orientation will be a mostly virtual experience, and our student affairs asked our team to create a short welcome video to kick off orientation. After a brain-storming session, we came up with the idea that would welcome students to campus and highlight Duke’s commitment to campus safety. Our approach was to welcome the students to college by creating a visual narrative where First-Year Advisory Counselor (FAC) students create a welcome mural out of sidewalk chalk to greet the class of 2024.
Bringing the mural to life
We wanted an aerial shot of the chalk mural with the Chapel in the background, so we opted for an early morning filming session to take advantage of the soft morning light and avoid the high temperatures of North Carolina’s summers.
University Photographer Megan Mendenhall, left, uses a crumpled plastic bag to blend the chalk by wiping it over the chalk in a circular motion.
Making a chalk mural was a new experience for the entire team. But thanks to a few “how-to” videos, we learned a helpful tip: crumpled plastic bags are the perfect tool for blending chalk. They save your hands from getting scraped by the rough pavement and create a smooth transition when mixing two different colors.
Welcome home, class of 2024!
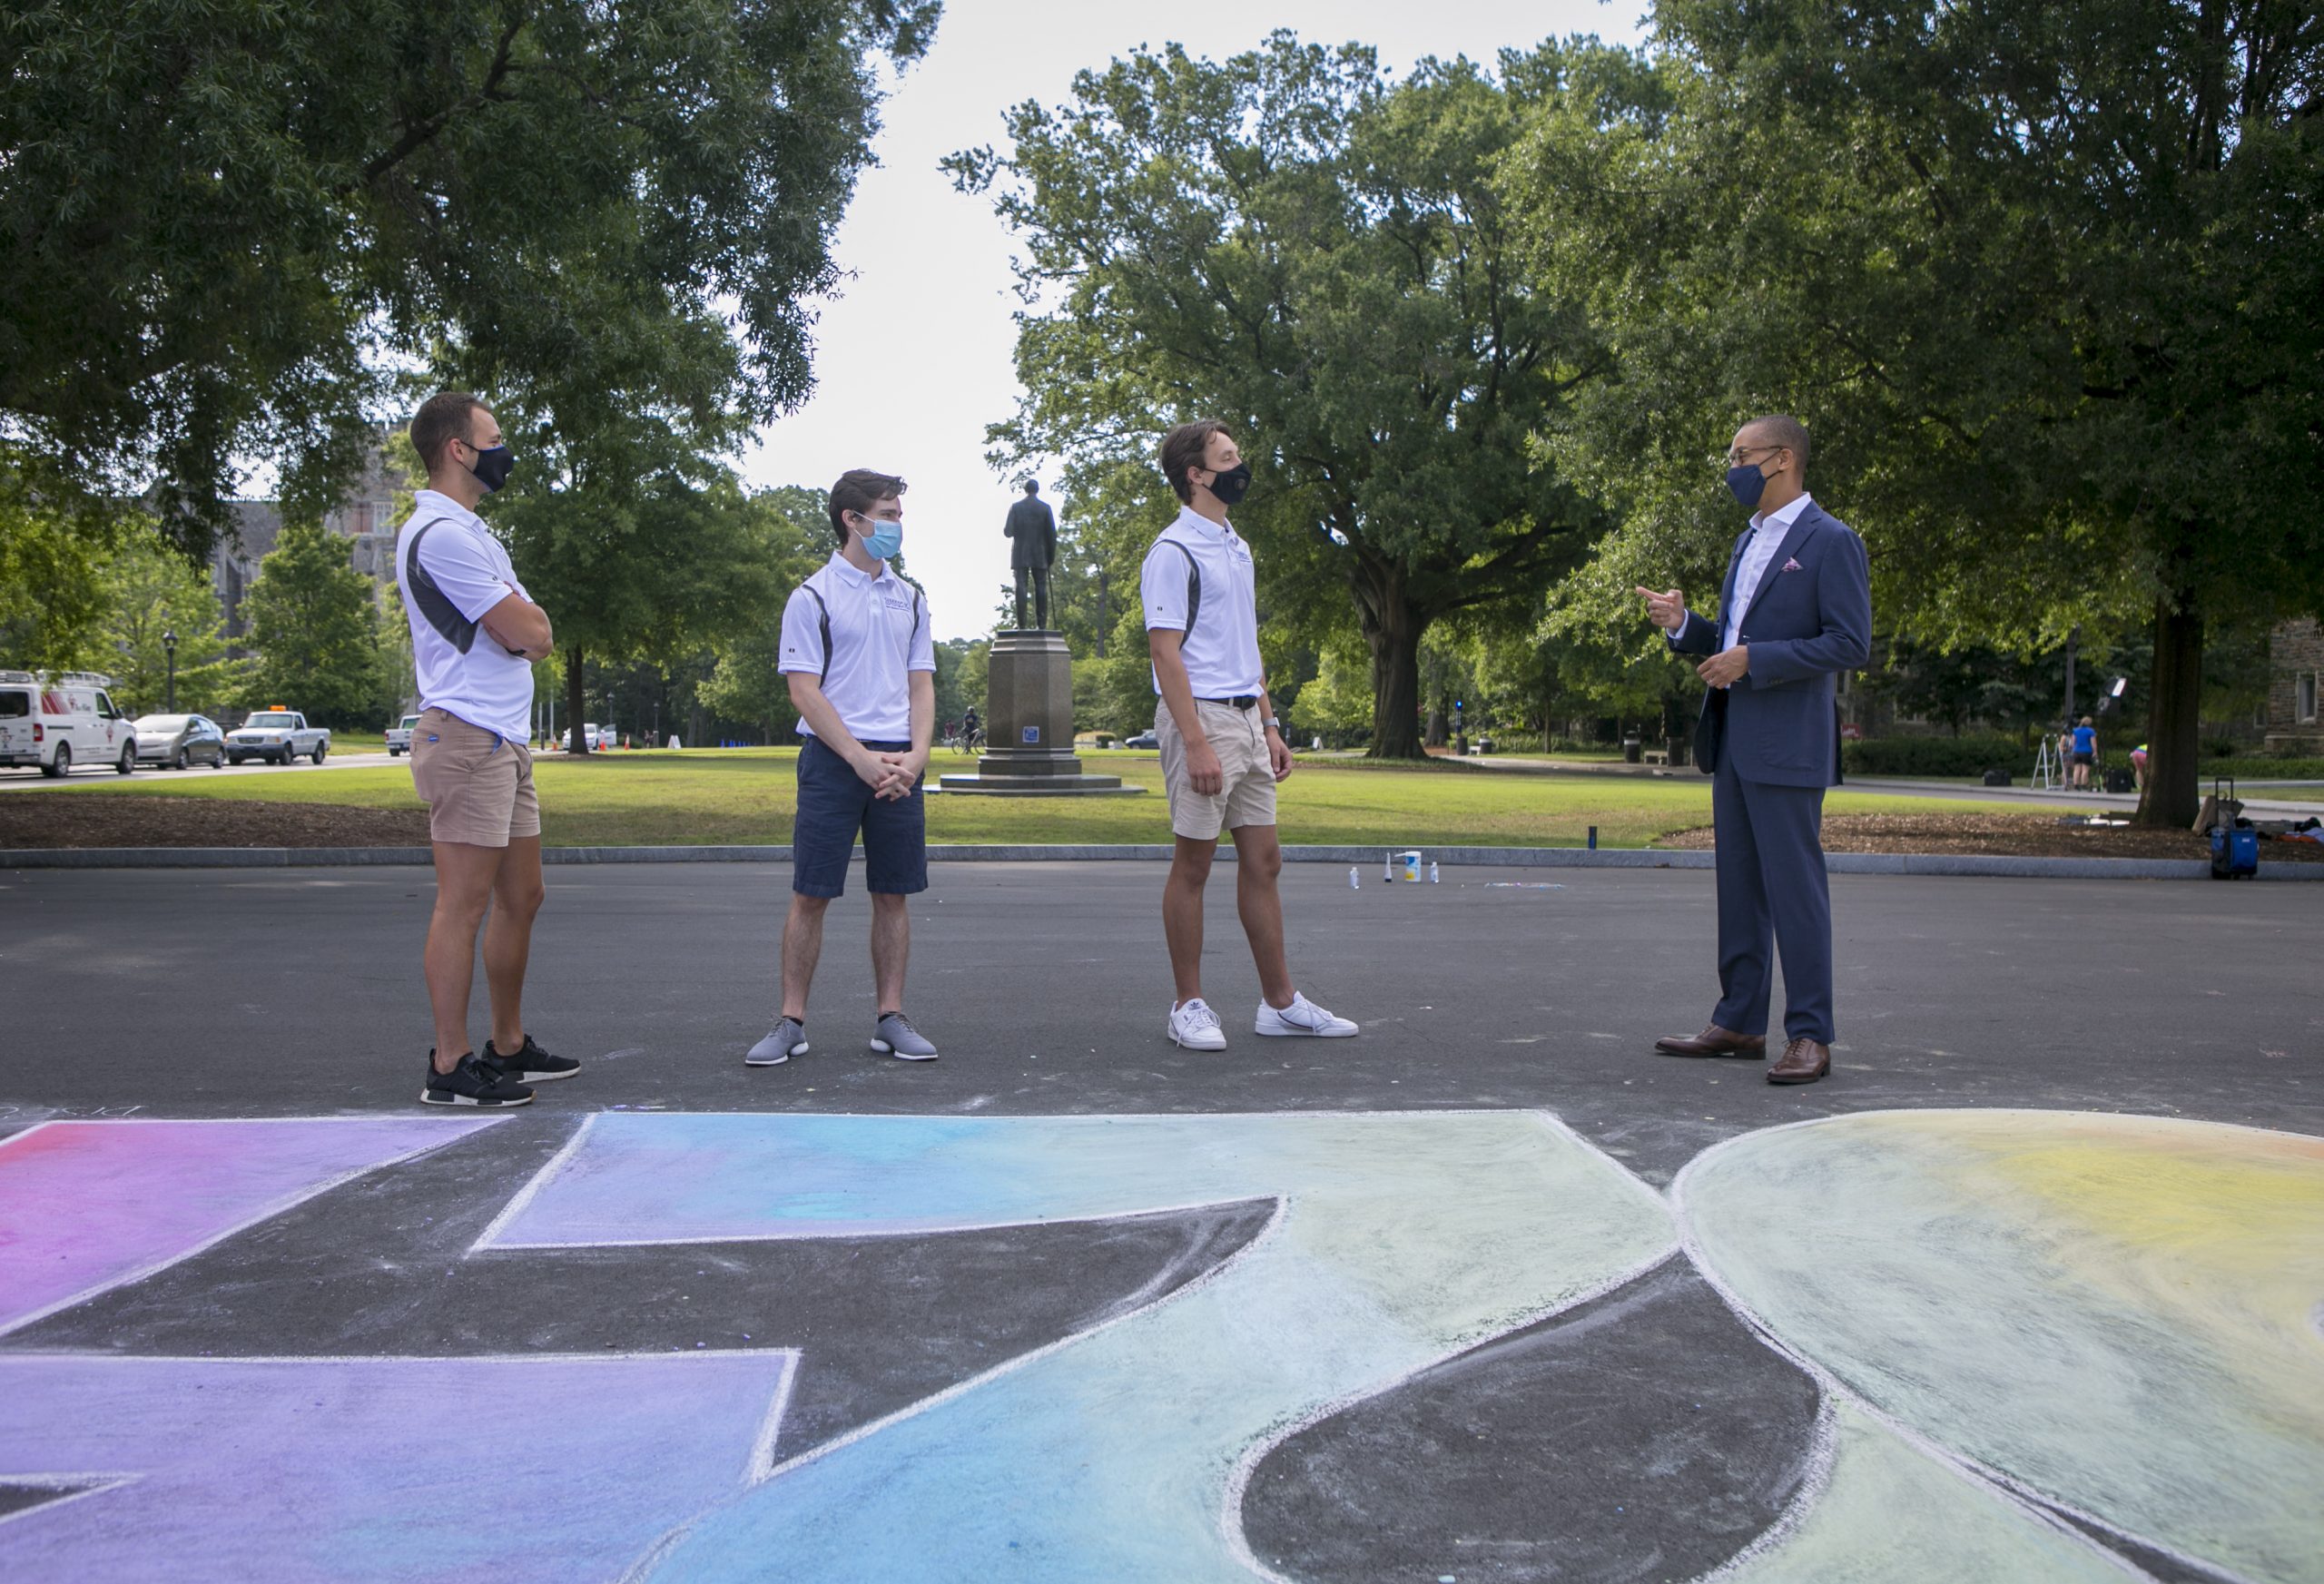
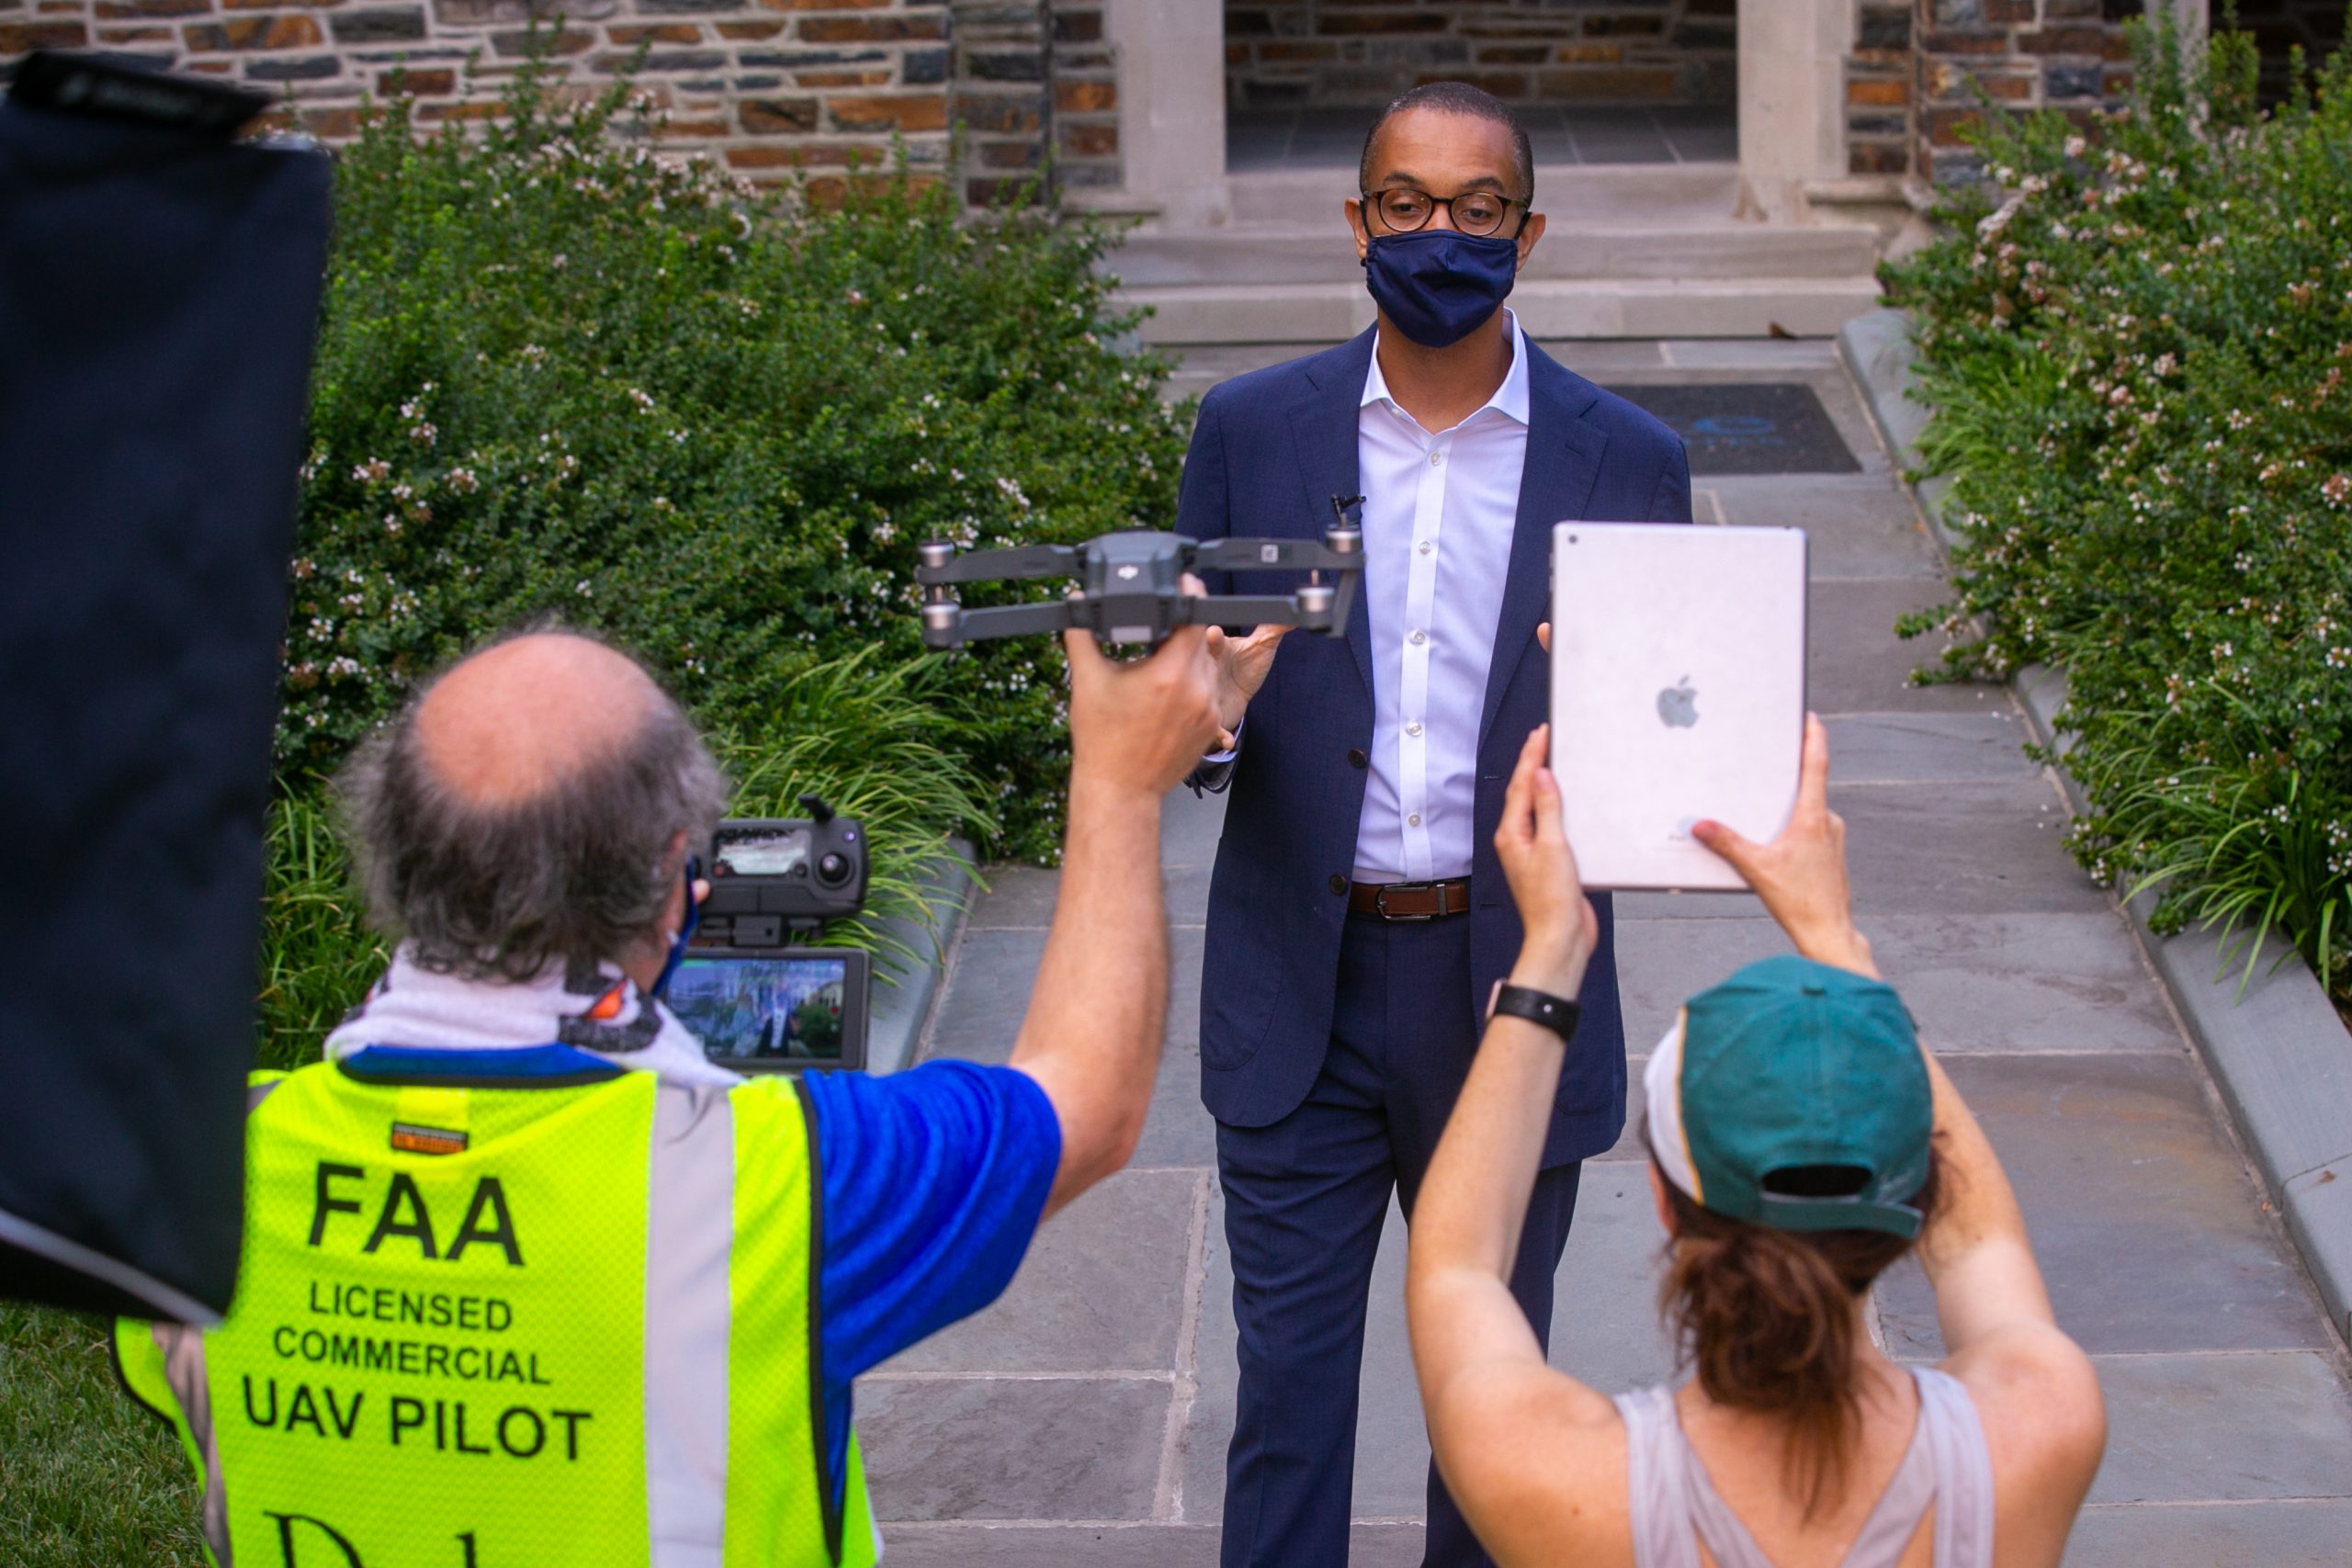
Gary Bennett, center, Vice Provost for Undergraduate Education, narrates the welcome video as Bill Snead, left, Digital Imaging/Asset Manager, and Julie Schoonmaker, right, Video Manager, record Bennett’s message to the class of 2024.
University Photographer Jared Lazarus, right, films Duke First-Year Advisory Counselor (FAC) students for the virtual welcome video for the class of 2024.
Duke First-Year Advisory Counselor (FAC) students wave to a drone camera that was filming them from above.
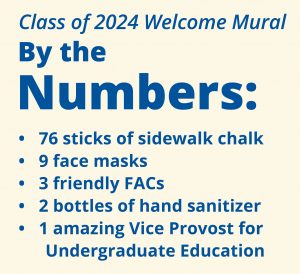
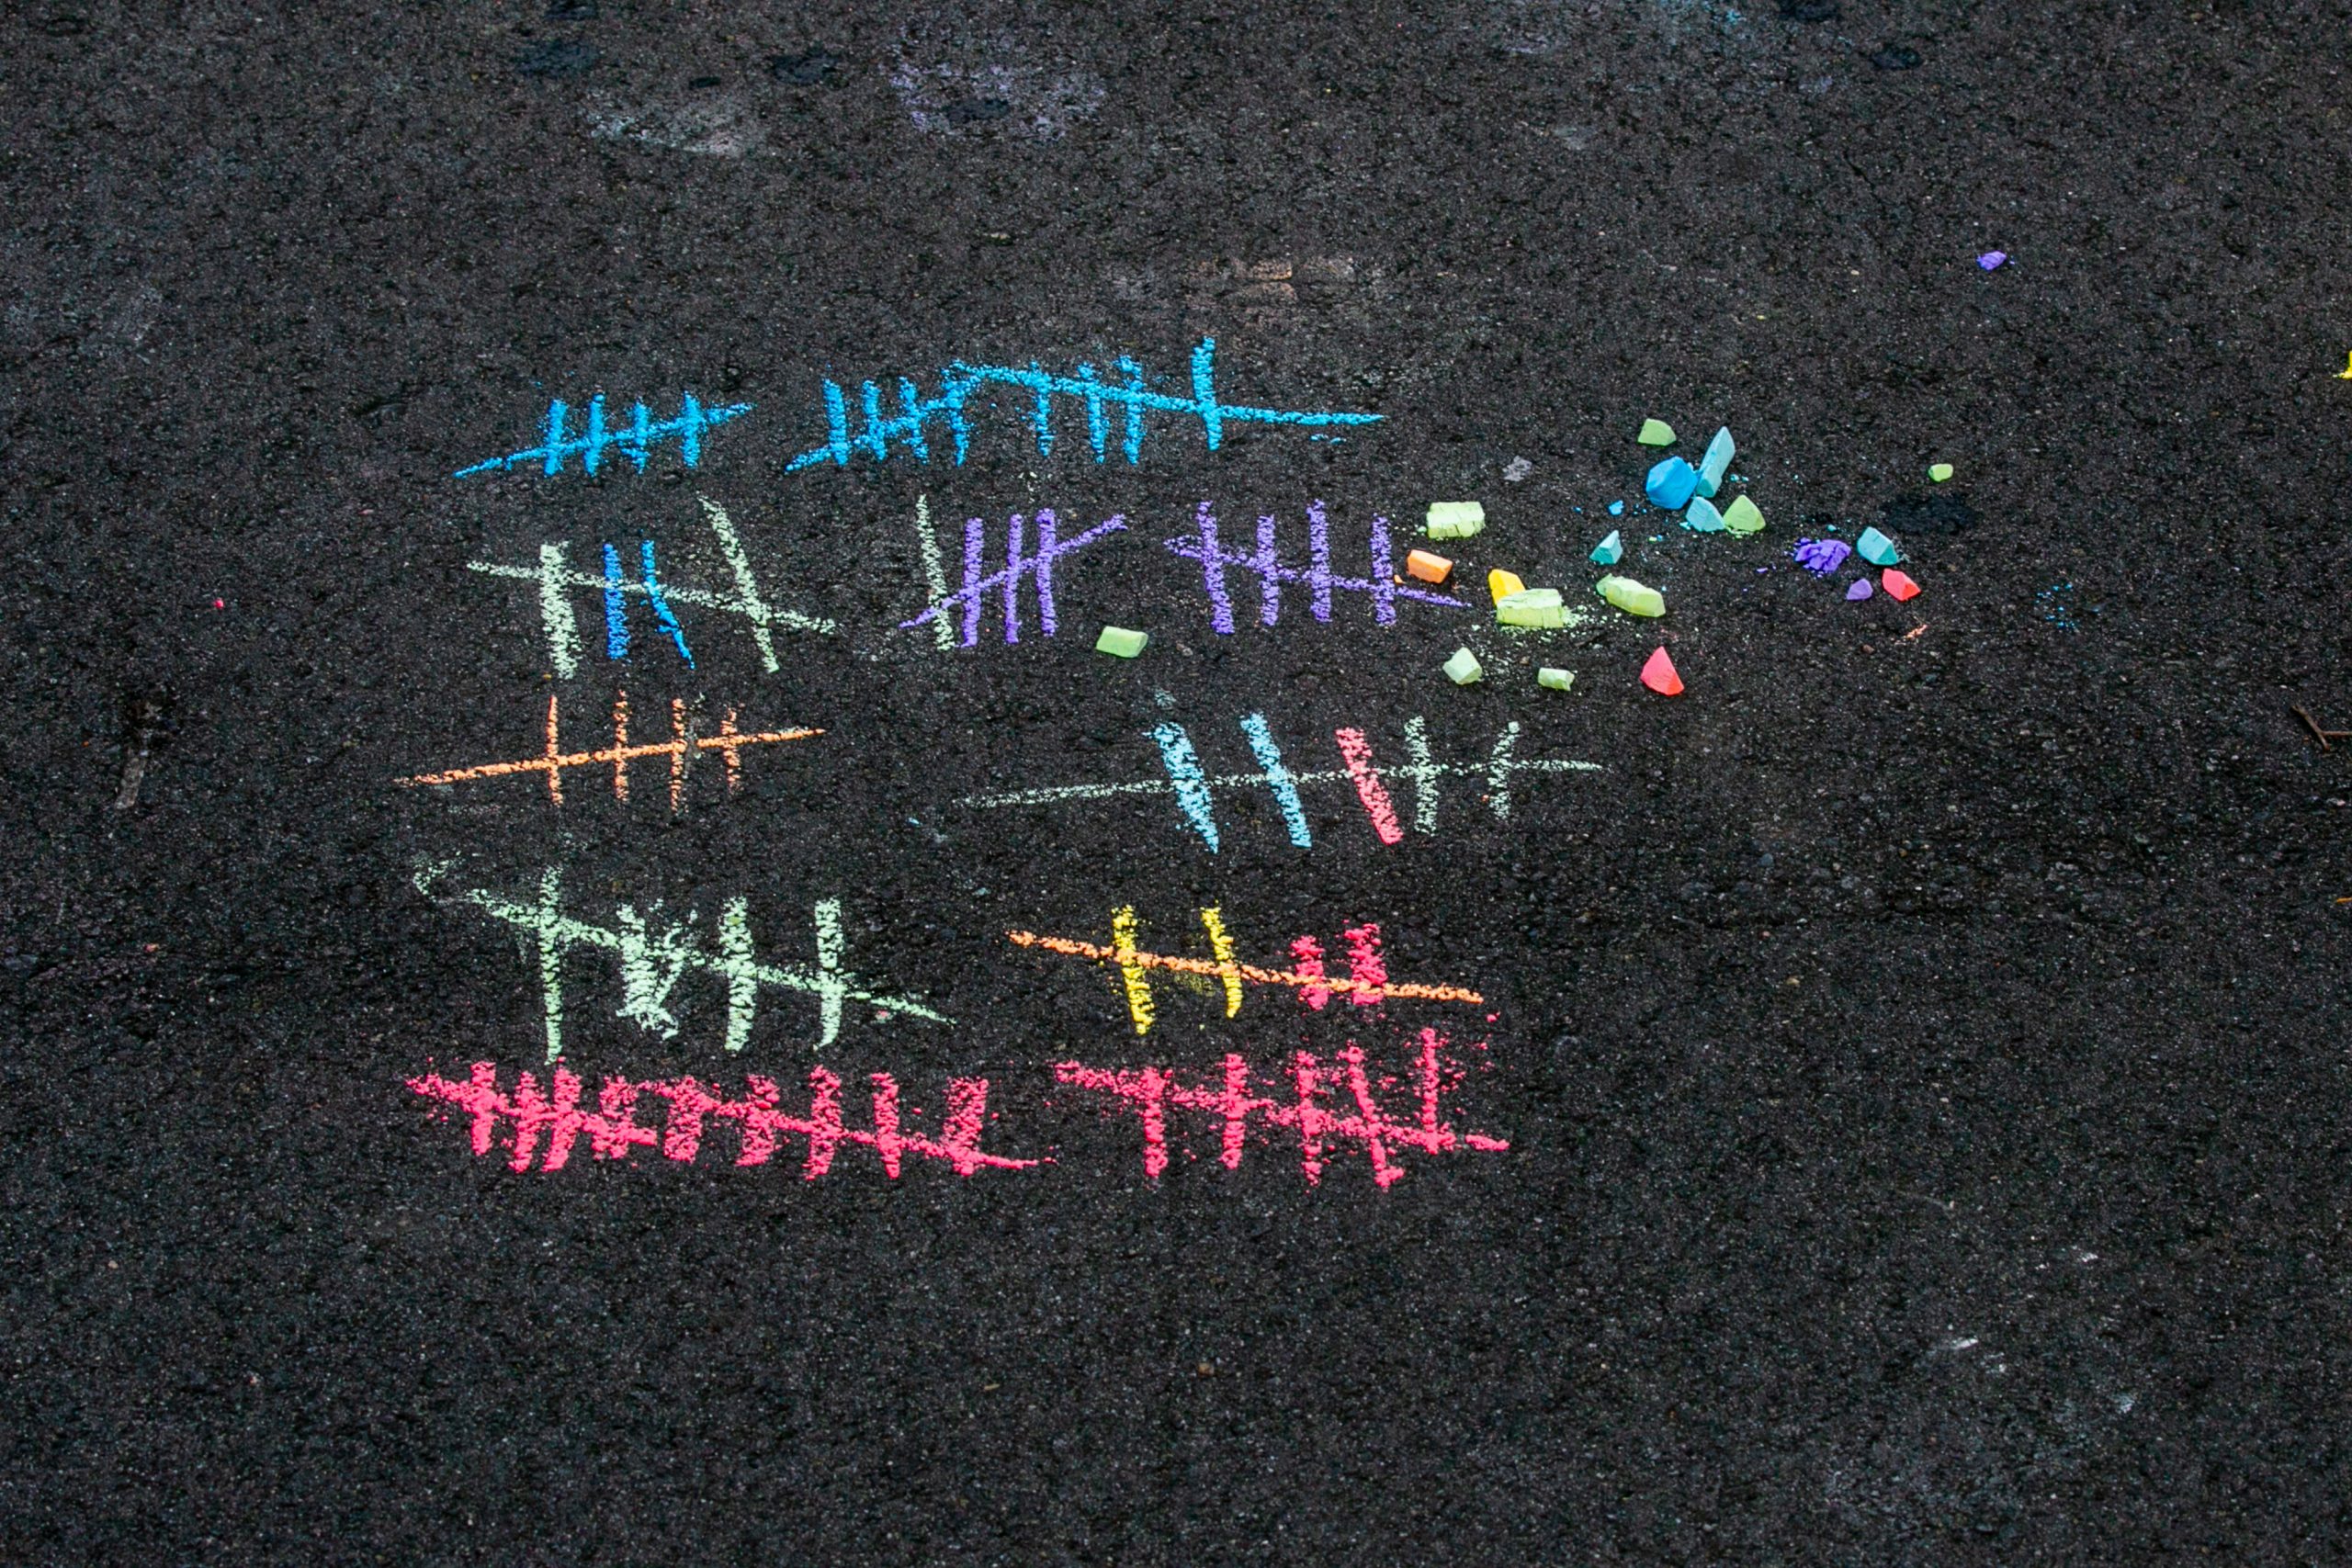
We counted the pieces of chalk used in making the mural by placing a hash mark on the ground.
After the filming session, people wrote messages in chalk around the mural welcoming the class of 2024 to Duke.
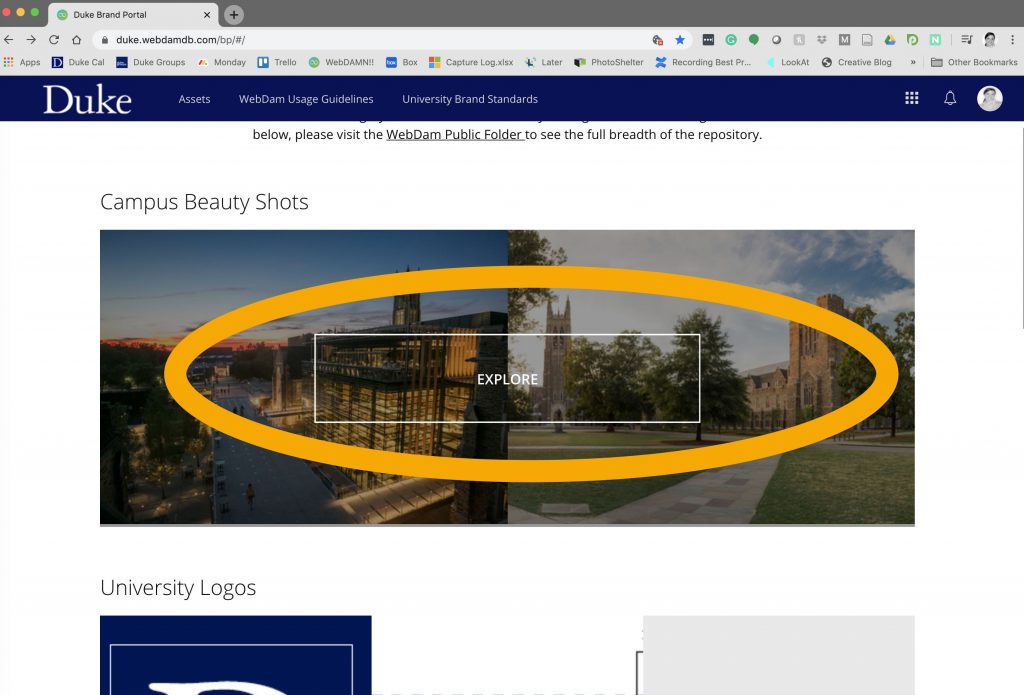
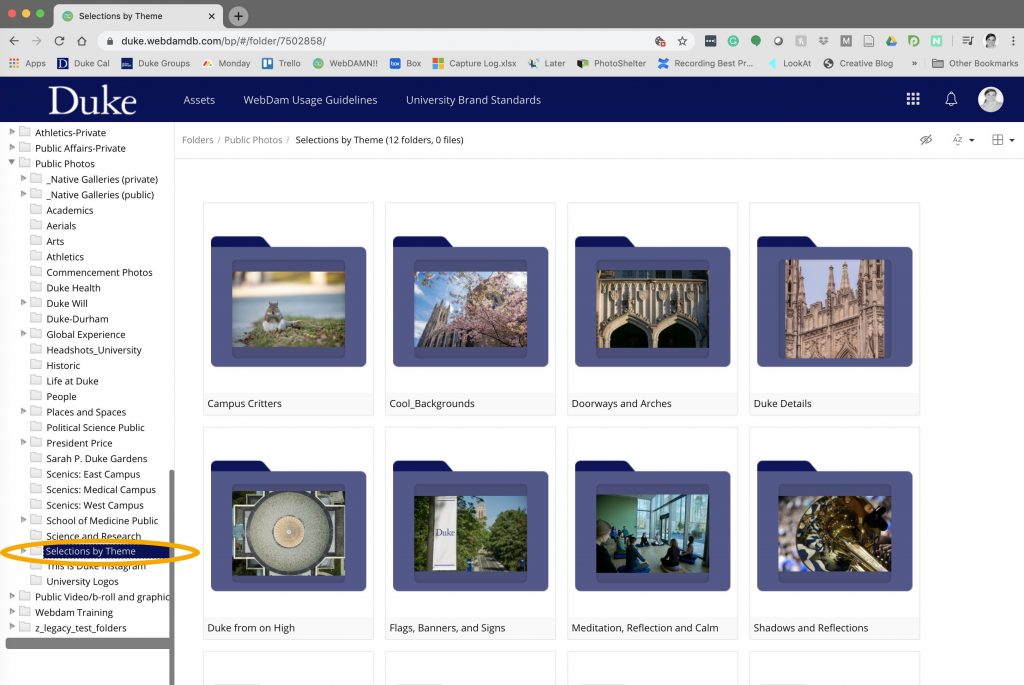
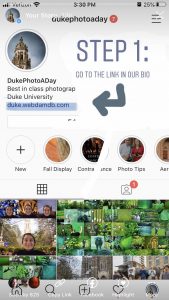
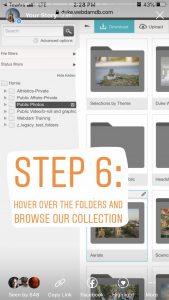
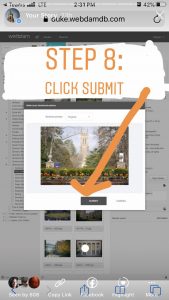
You can download these images from Duke’s Asset Management System (NETID required). The system is a wonderful resource of over 7,000 images. It is refreshed regularly with community-sourced photos as well as new imagery captured by the University Communications team.
Follow these steps to login and start downloading Duke imagery on your desktop or laptop.
We’ve put together a few tips for looking your best during video calls and while making video recordings.
Achieving flattering lighting doesn’t have to be complicated. Use a simple desk lamp or window to illuminate yourself during video conferences or when recording a video.
Dress for success
Choose your outfit based on your dress for an in-office meeting.
Solid colors, muted earth tones or blues work well.
Bright colors and white clothes reflect lots of light and are not the best choices.
Patterns, stripes, and plaids can blur and be distracting on camera.
Avoid any accessory that jingles or makes noise.
Find a well-lit recording location
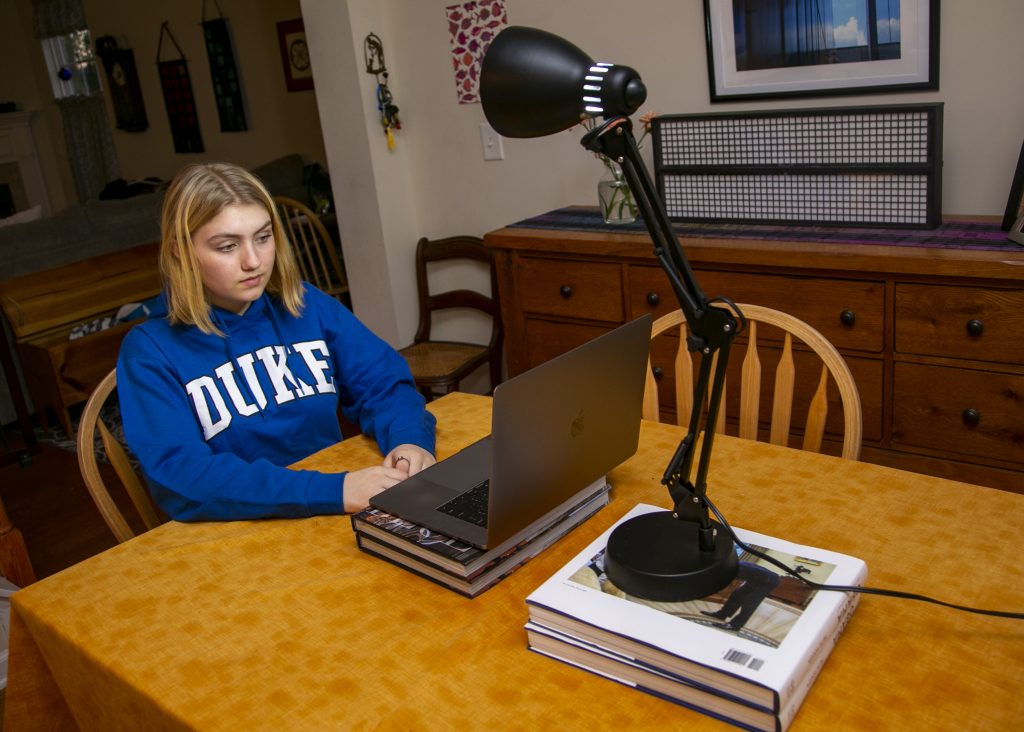
The desk lamp is pointed toward the subject’s face. Experiment with the angle and position of the lamp to find the most flattering position for your next video meeting or recording session.
For filming inside, position yourself facing towards the window so the natural light illuminates your face.
You can also use a lamp or other large light source to illuminate your face.
Avoid sitting with your back against the window because it will create a dark silhouette.
If you’re filming yourself outside, either film in all shade or all sun to avoid mixed lighting on your face.
Remember that there will be more ambient noise when filming outside.
The video shows how using a simple desk lamp to illuminate your face during a video meeting or video recording can improve the overall quality of the video.
Choose a neutral background
Before you start your call or video, take a moment to look at your background.
Remove any items that may be distracting.
If you are using Zoom, you might be able to use the virtual background feature. If so, you can choose from the preloaded options or upload a custom image or video of your choosing.
Position your device so that it is slightly above your eye-level. You might need to place your device on a stack of books or other flat, sturdy household items.
Experiment with the distance between you and your camera to find the distance where you look your best.
Remember to look at the camera and not your screen when talking.
Stack your laptop on top of a few books in order to get the camera just above eye level. If you are using a desk lamp as a light source, you may need to also elevate it, so that the light evenly illuminates your face.
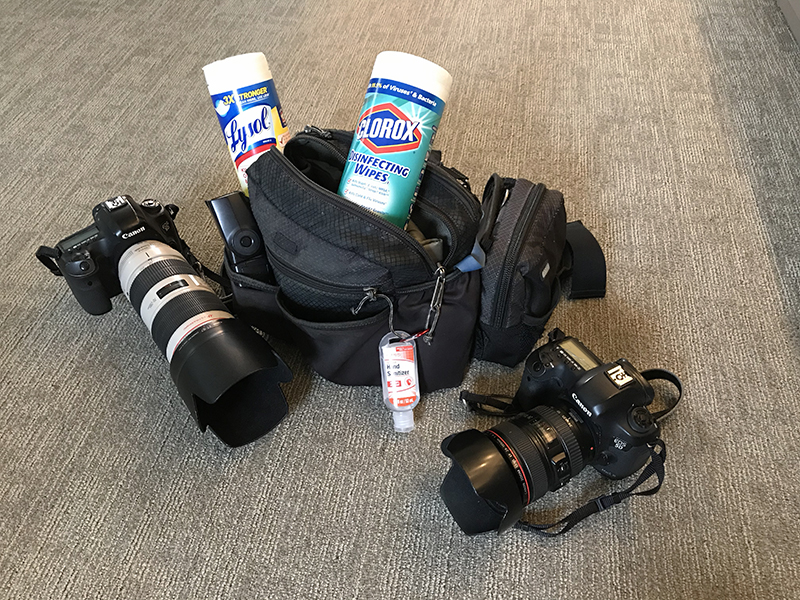
Remember to clean your camera equipment with disinfecting wipes before and after use.
We’re all adjusting to life during COVID-19 and for creatives who are used to working closely with others, this means adjusting our workflows to ensure that we are following social distancing practices and thoroughly sanitizing our equipment, especially pieces of gear that come in contact with our faces.
As a team, we’ve adopted these practices to keep our equipment sanitized.
Wash your hands before and after touching any equipment.
Wipe down gear before and after each session (including equipment cases)
Use hand sanitizer during sessions, especially if you are readjusting equipment.
Wipe down the lav mic kit before and after interviews with a wipe or disinfectant foam
Guide interview subjects in putting on the lav mic themselves.
Keep a safe distance during filming.
Remember to pack wipes and hand sanitizer in your equipment kits!
First and foremost, recognize the seriousness of this pandemic and try to postpone video and photo sessions. We are reaching out to our subjects and encouraging them to reschedule their sessions. If the session is time-sensitive, see if your subjects can record themselves using Zoom, Microsoft Teams or other recording software.
If you absolutely need to record an in-person session, we recommend practicing social distancing by staying at least three feet away from your subject.
Stay safe, be smart, and keep washing your hands and equipment.
Step 2. Under Zoom
preferences, adjust the following settings:
Under audio settings, select “automatically
adjust microphone volume”
Under video settings, select “16:9
(widescreen)”
Under recordings, it’s best to choose a spot
to store your video recordings. Under “local recordings” at the very top, you
can pick a spot on your computer to do this. For instance, you can create a
folder on your desktop called “Zoom recordings” and send all your clips there.
Under recordings, select “optimize for 3rd
party editor” which will make the video clips ready for editing.
Step 3. Launch zoom and select “new meeting,” which is the
orange icon on the top row. If prompted, allow Zoom to access your computer’s
video camera and microphone. When the next screen pops up, you should be able
to see video yourself.
Step 4. On the lower left corner of the recording screen,
make sure to select “unmute” so your voice is audible during the recording.
Step 5. In the menu bar on the bottom of the screen, select
“record” and choose whether you’d like to record to your message to the
computer or cloud.
Step 6. When recording your message, direct your gaze toward
to the top of the computer screen where the camera is located. Speak clearly at
your normal volume.
Step 7. When you’ve finished your message, press “stop recording” on the top left of the screen. Then select “end meeting” on the bottom right of the screen. At that point your video will convert to an .mp4 video file. You can upload the video file to Duke box to share it for further editing such as adding name supers and Duke bumpers or share the file directly on your communication channels.
One of the toughest challenges with the New Faculty Profiles portrait series is finding a way to visually represent the faculty member’s research into the portrait. This was just the challenge I faced when photographing Professor Neil Gong, an Assistant Professor of Electrical and Computer Engineering, who is an expert in cybersecurity and data privacy technologies.
In the past, I’ve solved this problem by finding a visually interesting image from the faculty member’s research papers to use a backdrop for their portrait. However, Professor Gong didn’t have an image that would work. So, I decided to look through his website and research papers to see if I could find or create a background image from charts and diagrams included in his papers.
I am by no means a coding expert, but I know that some computer languages resemble patterns that I find visually interesting. So, when I saw a link to source code documents that he used for one of his research projects, I downloaded it, hoping to find something that could work as a backdrop image.
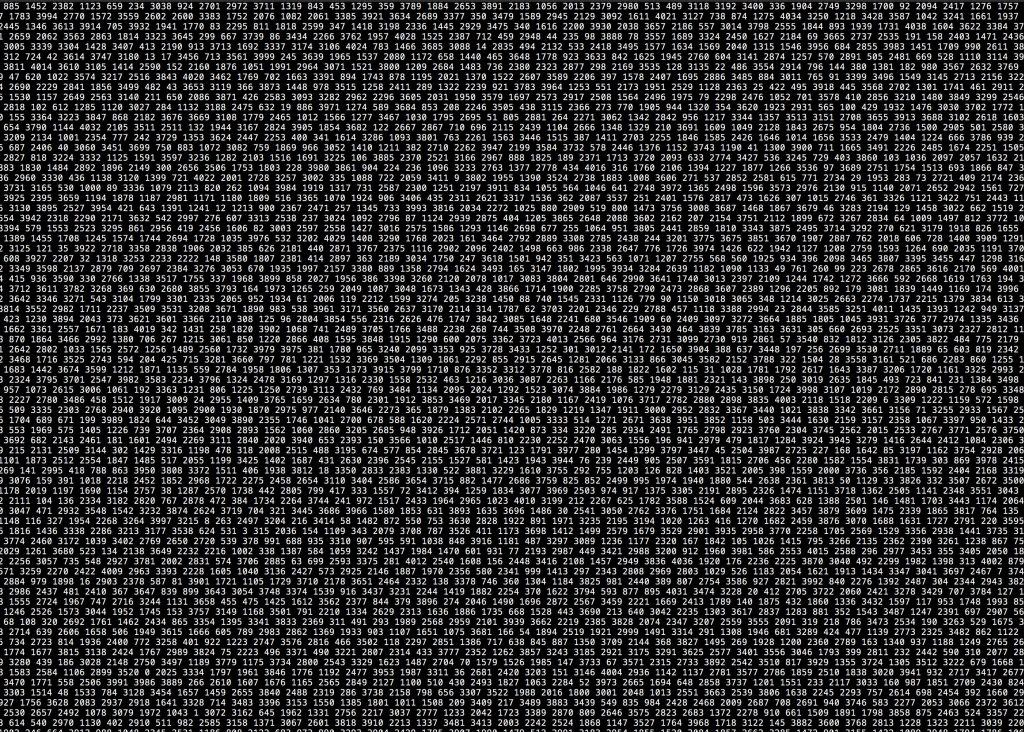
I ended up finding a text document with columns of four-digit numbers. I have NO idea what the numbers represent or how they are used, but they formed an interesting pattern. After adding a few adjustments to the original document, I had a dynamic background image that referenced Professor Gong’s field of study.
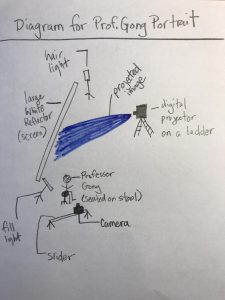
After got the background image working, I to add a fill light and a hair light. I opted to use video lights so that I could easily switch between stills and video.
I ended up using a slider to create the video clip because I really wanted the numbers to have the appearance of moving. After an hour of practice pulls with the slider, I was ready for Professor Gong’s portrait session.
Every August, the entire first-year class gathers on the East Campus Quad for the annual group photo. This activity is one of only two experiences that the entire class participates in together as a group — the other is commencement.
First-year class photos through the years.
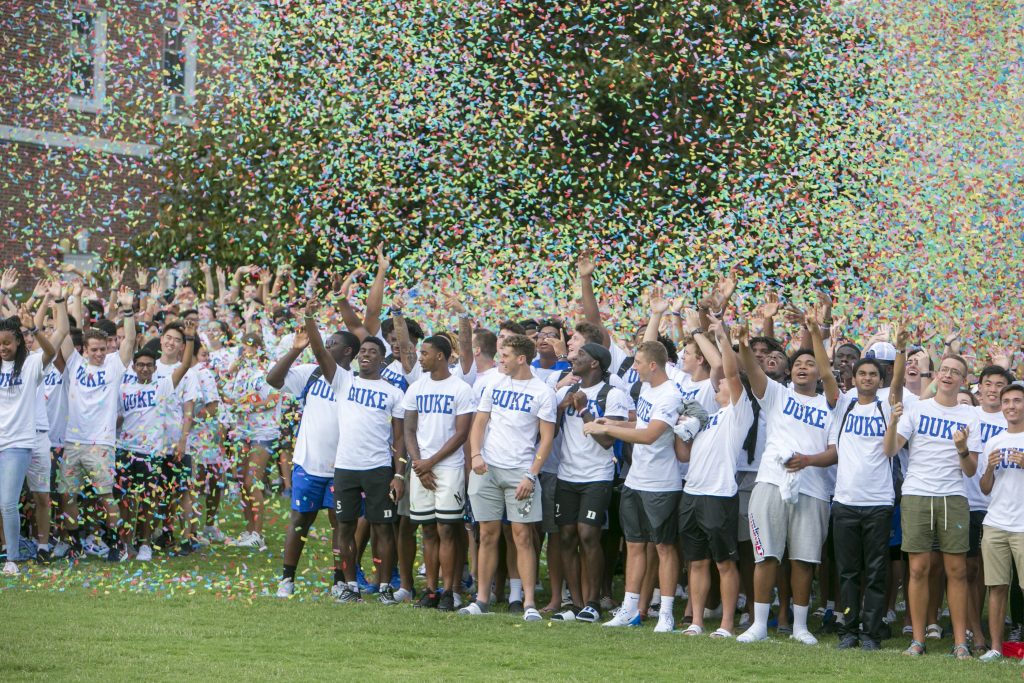
We wanted to build on this event by transforming it into an experience. One of the ways that we accomplished this is by using a drone to record video footage of the class of 2023. The second is with the addition of confetti!
Using the Drone:
Bill practices operating the drone over the East Campus Quad.
My colleague Bill Snead, who aced his commercial drone license exam, piloted the mission. Prior to the big day, he logged over 16 hours of practice time on East Campus. He used a DJI Mavic quadcopter, which we checked out from the Innovation Co-Lab for the event and practice sessions.
Prior to each drone flight, Bill runs through a pre-flight checklist.
Each practice session was approved by Duke and we also notified Duke Life Flight and Duke Police before each session. Before each flight, he went through a detailed pre-flight checklist, which included the purchase of insurance.
Adding Confetti:
Our number one goal was to use the class photo event to give the incoming students a fun and welcoming experience at Duke. We wanted the photo to have the feel and excitement of a pep rally. We toyed around with several ideas, but we ultimately arrived on confetti because its colorful motion looks great on video! We worked with Ultra Mix Events, who provided the confetti blowers and tech crew.
First-year students spell out “2023” during the annual Class Photo on the East Campus Quad.
By The Numbers:
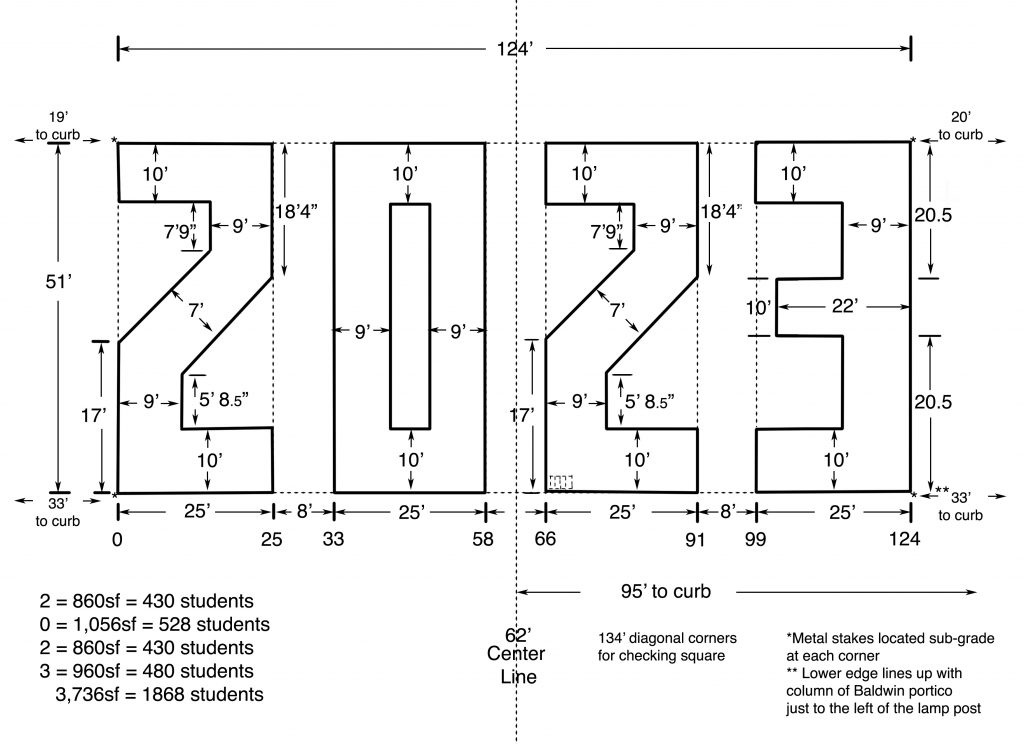
The key to getting the students to spell out their graduation year is to outline the numbers onto the quad.
The diagram for creating the Class of 2023 photo. It has become a Duke tradition for every incoming first-year class to take a group photo.
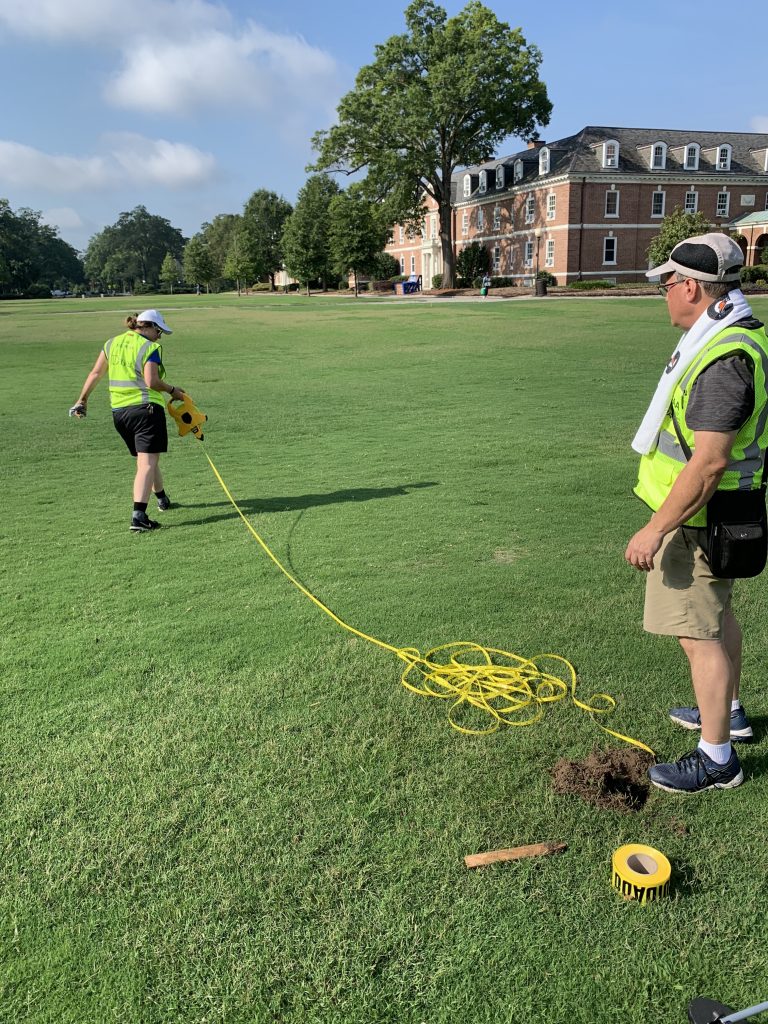
Megan Mendenhall, left, and Bill Snead, right, use a measuring tape to mark the outline of the class photo. This year, the temperatures were in the high 90s, so our team took frequent breaks and drank plenty of water.
We’ve been doing this project so long that we have measurements for 0 – 9. So, creating the diagram for each class simply involves combining the appropriate numbers into a diagram. The tough part is actually painting the outline of the numbers onto the quad, especially in the heat and humidity of late August.
Jared Lazarus, left, Caroline Pate, center, and Sam Huntley, right, stand in the outline of the number 3, as other team members (not pictured) view the numbers from above.
We start by roping off a giant rectangle on the quad. Next, we section the rectangle into four equal rectangles. Each of these smaller rectangles is turned into individual numbers by adding the appropriate angles and lines.
The Big Moment:
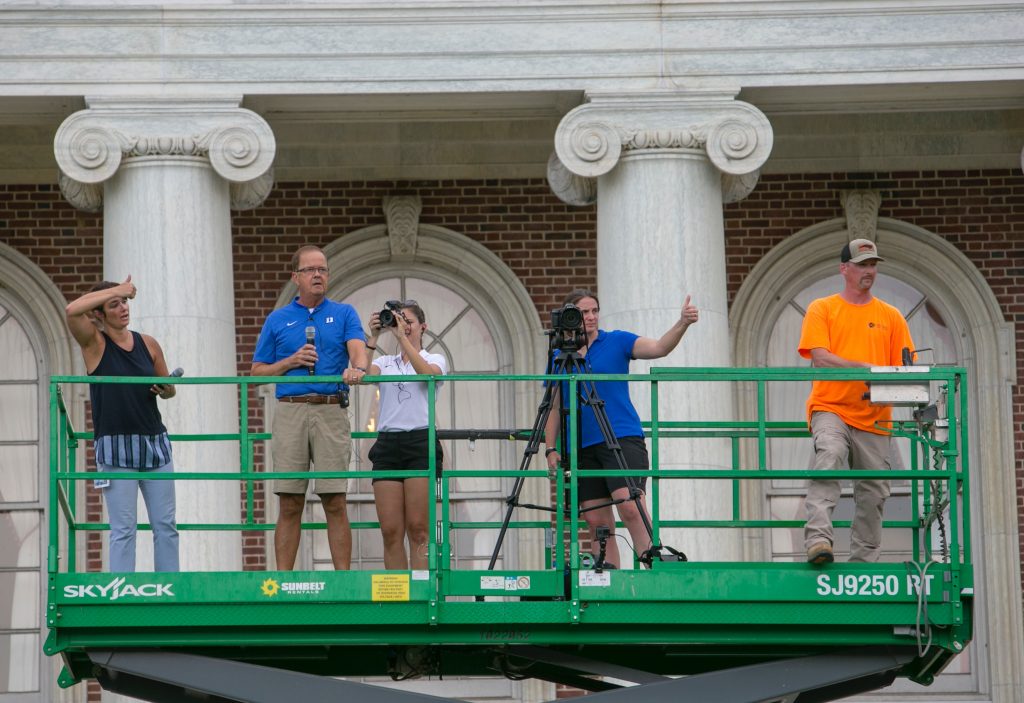
We wanted the drone to be in a position to capture the students as the confetti rained down. To accomplish this shot, we needed to communicate with Bill, the drone pilot, and members of the confetti crew, who were spread out in four different locations on the quad.
Left to right, Blyth Morrell, Coach Cutcliffe, Rebecca Fiorentino, Megan Mendenhall, and Matt Carden, signal to the ground crew to start the confetti blowers.
In order to keep everyone on the same page, we used the PA system to play music to cue the confetti team and Bill Snead, the drone pilot. As you can see in the video, the music not only worked as a great system for communicating with the different crews, but it also added to the upbeat feel of the experience.